
My aim is to build a canoe for camping trips. I’m a novice kayaker, 6’ 2” and 75kg. My experience of canoes is limited to very stable craft in excess of 32″beam. I decided on a Double-Paddle Canoe with a theoretical capacity of 90-110kg. Length about 13′ 6″. Beam 28″. Depth 10.5″.
Started by mocking up various length ribs, using strips of damp MDF (Cheaper than green oak !);


Brian’s basic formula for determining the longest rib, (beam x 1.35) +2 = 39.8”.
Rounded up to 40” it gives a reasonable looking profile. I tried a 41” which is far too flat bottomed. The other extreme is 38” which looks pretty unstable but would be fast and track well, if I didn’t fall out.
The 39” rib feels like a good compromise, bearing in mind that this is not the final profile as the addition of stringers will alter that.
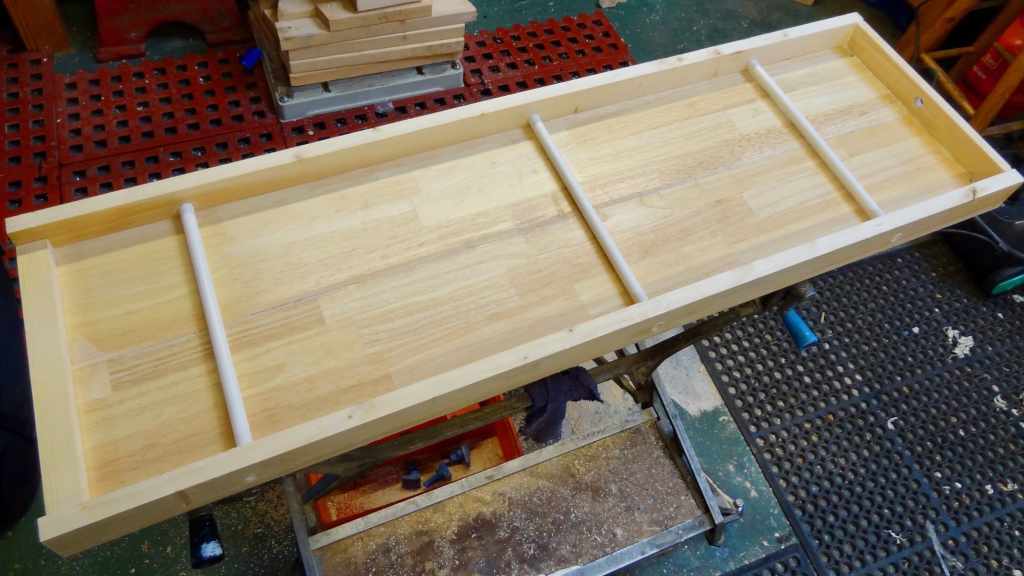
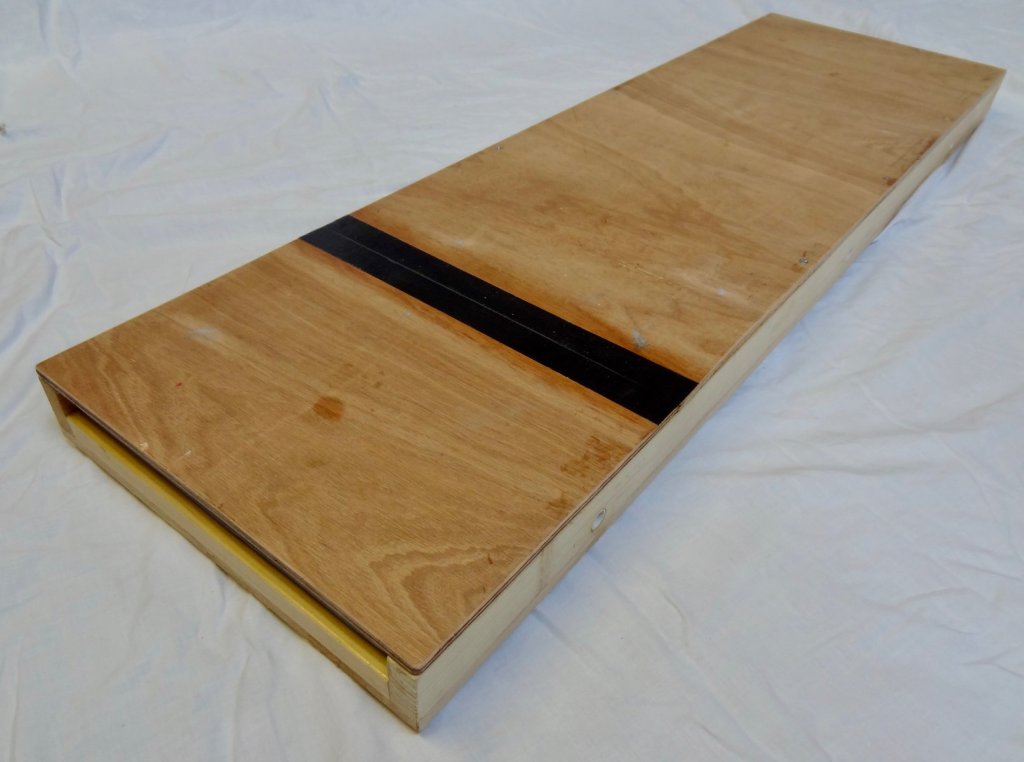
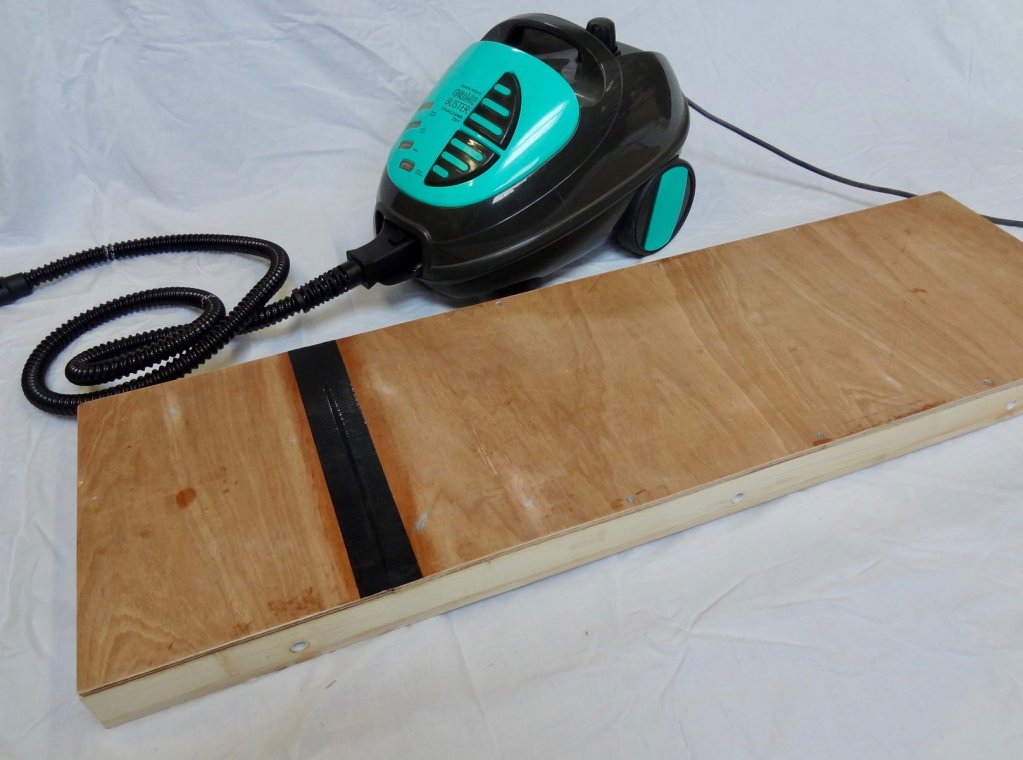
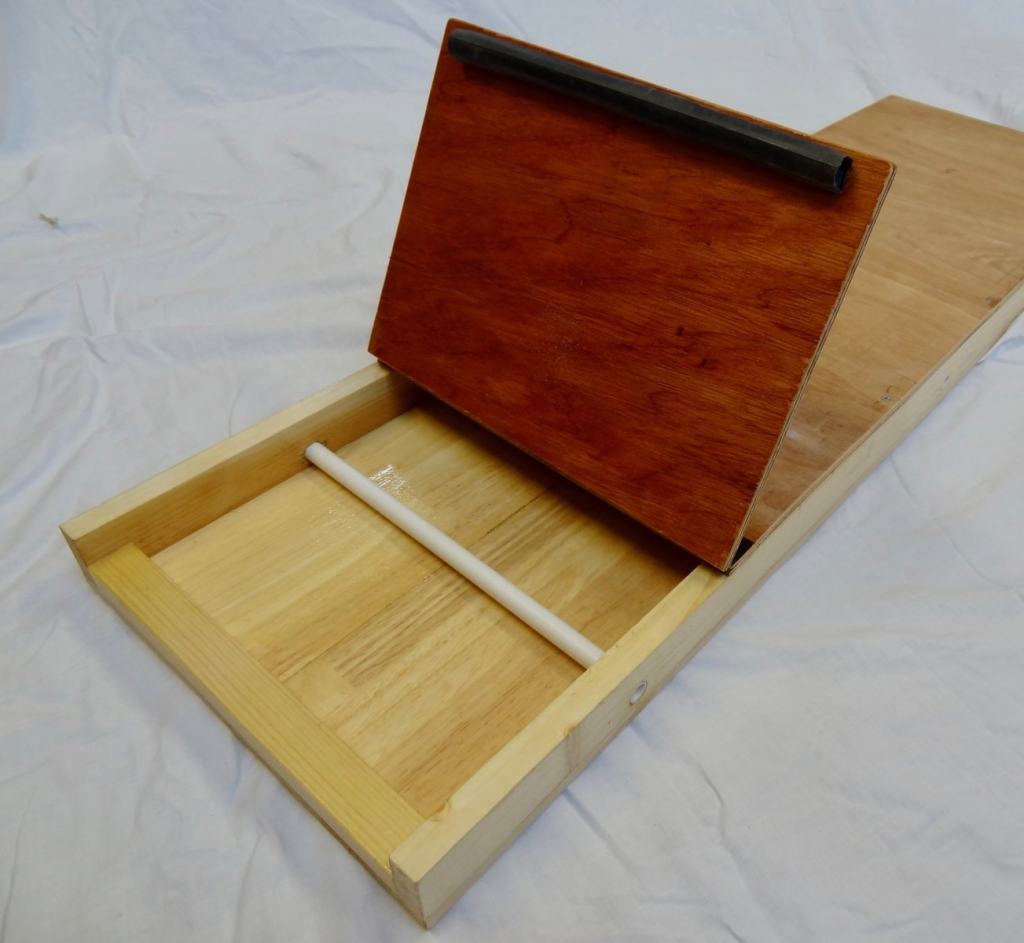
Steam Box
Made a Steam Box entirely from workshop scrap. Unearthed an old, rarely used, steam cleaner which I hope will be perfect for the job.
Made quite a narrow box (11″ inside) as I will be experimenting with some variations on Brian’s plan so will only be working on a few ribs at a time. Chose plastic tubing instead of dowel for the supports. Added an ‘access flap’ just in case any small ribs disappear inside and have to be retrieved. Also like the idea of having the whole rib inside the box, instead of one end hanging outside, so both ends get an equal steaming. Used a piece of cycle inner tube as a ‘rubber gasket’ over the opening, to conserve steam.


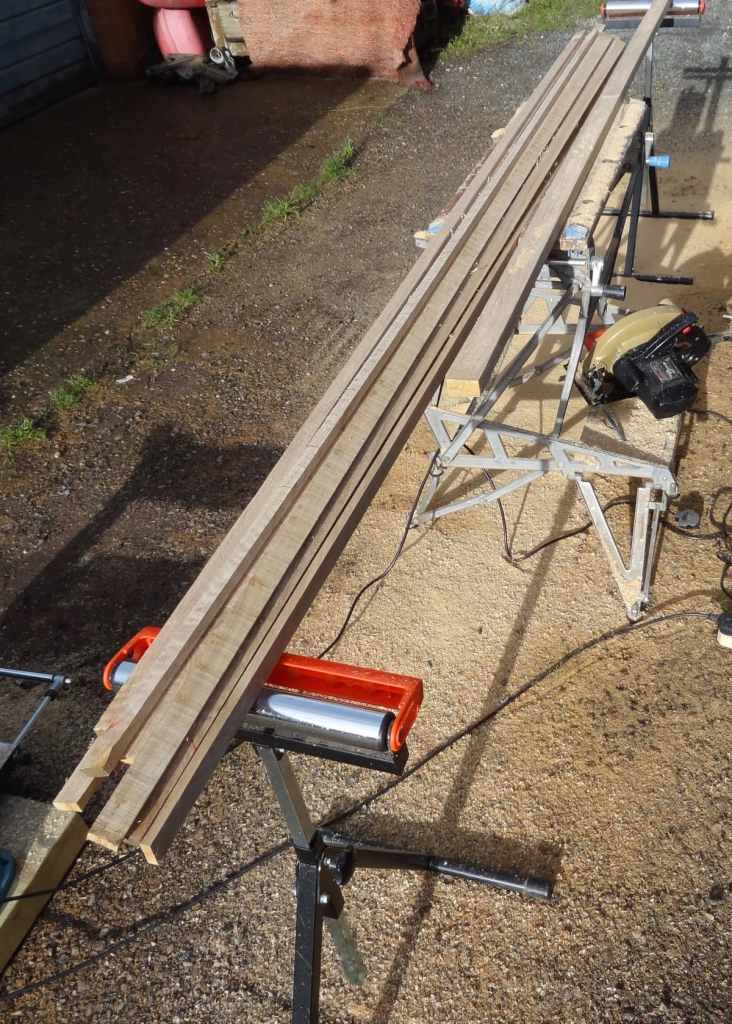
Shopping Trip
Went to three sawmills today. Got all the timber for a 66 Canoe;

For anyone in my area, here’s were I went;
Local Green Bending Oak from John Moody in Sheepwash, near Modbury, South Devon. He specialises in marine timber so understands rib bending requirements.
Local Ash for the Portage Yoke from John Bradford at Wiggaton, near Ottery-St.-Mary, East Devon. A very small sawmill only dealing with local timber, mostly oak, ash and douglas fir.
Western Red Cedar from Devon Hardwoods at Newton Poppleford, East Devon. Importers of speciality timber. My Cedar came from Canada.
Prevaricating and more wet MDF!
Being a very newbie kayaker I’m obsessing about stability and freeboard. Decided to increase my beam to 29″, with a Depth-to-Beam Ratio of 0.375. This gives a depth of 10.875″. Adapted my rib test board and a 39.5″ rib looks about right, resulting in a Rib-to-Beam Ratio of 1.362 (I’ll call it 1.36 and shave 1/16″ off the rib length !).

Waiting for a new rip-saw blade to arrive, then I’ll fire up my steam box and confirm this with a real bit of oak.
Laminating Gunwales
Used every clamp I own.
Left the three lamination layers overnight, before gluing, with a weight in the centre to reduce rebound.

Reduced my centre post sheer depth from 7″ to 6 ¾”. Resulting rebound was less than ¼”


When I set up a line to check the sheer I also measured a few rib locations either side of the centre and found the resulting curve was asymmetrical. May have been the weight of my clamps unevenly distributed. Not a problem as I’m building asymmetry into my design (more later). I just had to ensure the end with the most curve was aft and the end with less curve towards the bow, giving a bit more freeboard forward.
I used Titebond III glue and a roller applicator, which was perfect as the roller is the same width as the timber.
Also discovered (when I’d finished!) the thread on the applicator matches the Titebond bottle.

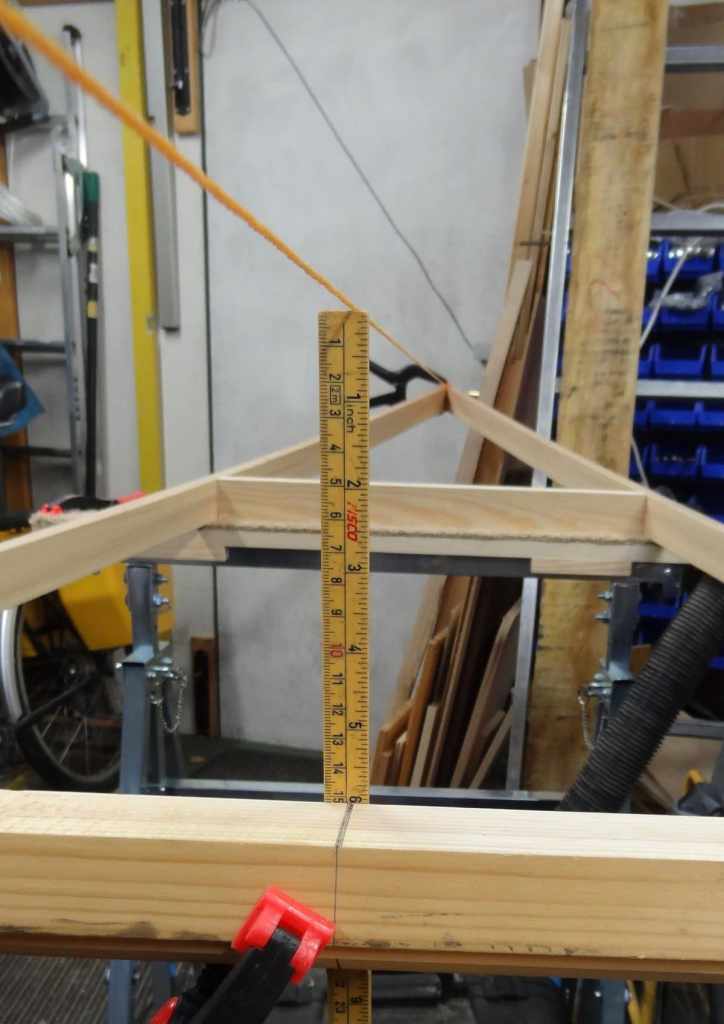
Depth Measuring Angst
Just realised that on my previous rib mock-ups I had been measuring canoe depth to the top of the keel, where the rib touches the keel. It should be to the bottom of the keel, ie. 7/16″ more.
Luckily I was still prevaricating over Depth:Beam ratios so I have now repositioned my ‘keel’ ;

Also gone back to a 28″ beam, to maximise elbow clearance as I want a little more freeboard.
Gunwale Layout & Asymmetry


Centre spreader 5″ aft of centre.
Front spreader 1 5/8″ narrower than rear spreader.
Check C/L with string …… only 1/64th out after gluing.
More springback but a weight on the centre spreader overnight resolved the issue
Morticing

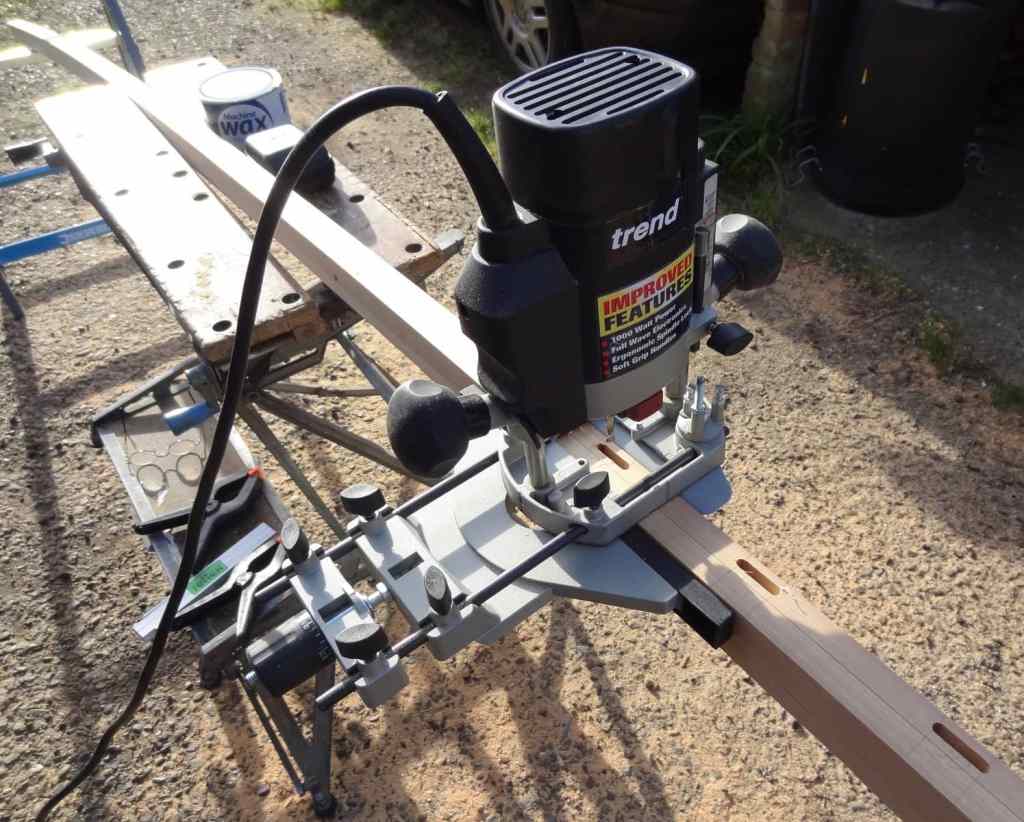
Had one fence for my router…..made a second one from leftover Velux skylight flashing.
Used a 6.3mm (¼”) bit but wanted 7mm wide mortices so left 0.7mm slack on the fences.
(N.B. Finding US measurements, especially 64ths, tricky ……converting a lot to Metric ….but trying to stick to ye olde feet and inches in this blog.)
Keel, Stems & Rocker
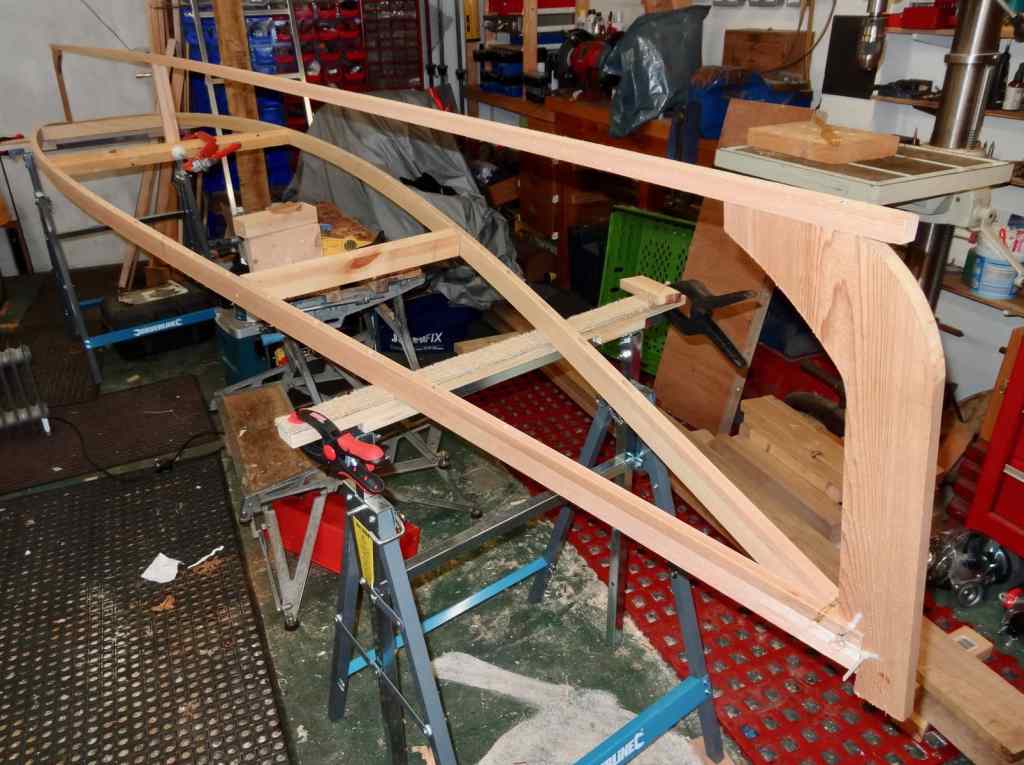
Set up keel stems and rocker.
Starting to look like a canoe.
Adjusting distance between trestles fine tuned rocker.
Prepping Rib Stock
Router radius cutter for rib corners

Rib Measuring Stick
The canoe asymmetry shows up on the stick.
I found it easier to do the adjustments in millimetres.

White oak rib stock looking good………steam bending tomorrow
Steam Bending


Problem with grain run-out on the sharper bends.
Grain not parallel to edges of rib.


Ribs all done…..eventually. Spent long time making adjustments with a hot air gun and various clamps, etc.
Lot of wastage but luckily I had spare oak.
Looking at the photos I can see a few misaligned. Need a bit more tweeking with the hot air gun.
Asymmetry shows up well.
Stringers


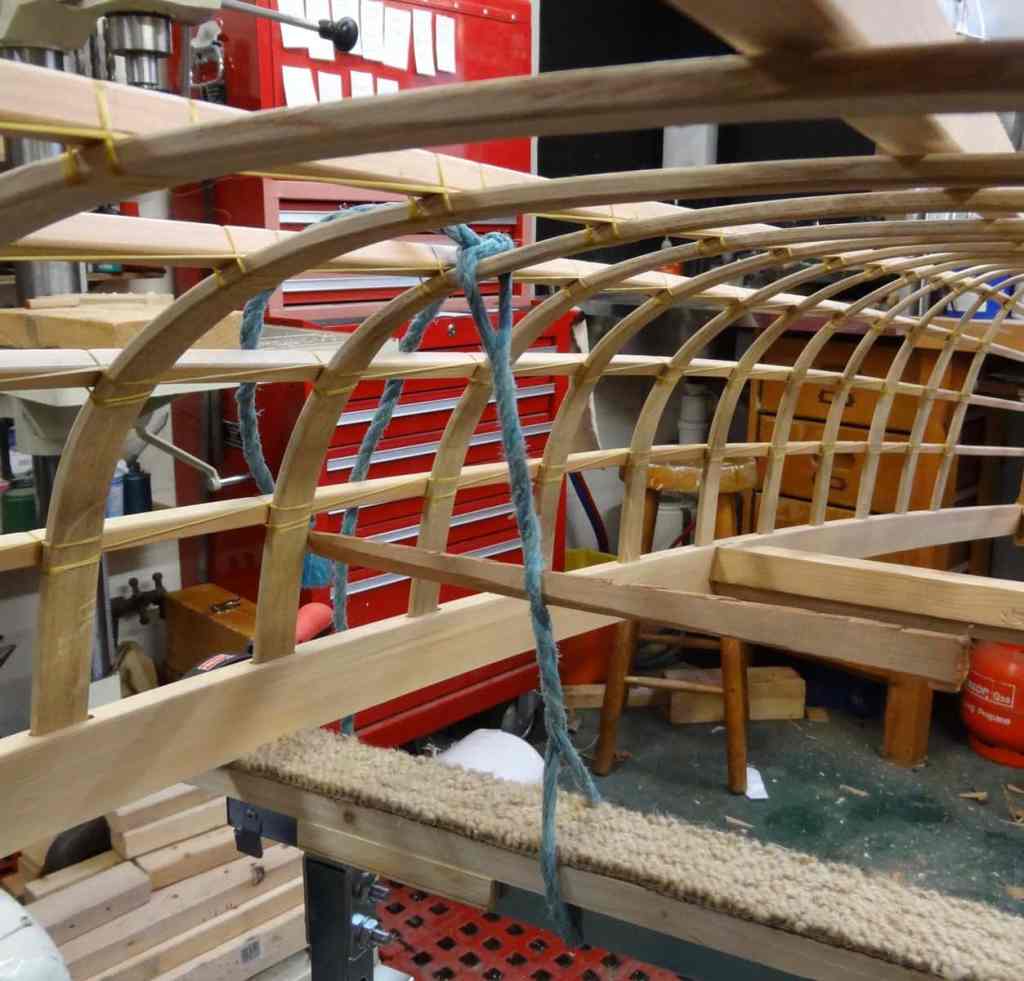


Clamping last stringer
Aligning and Lashing Keel
Nice curve, no bumps or dips. Had to shim ribs 1 and 2, at the bow. Also 27 (the one nearest the stern). Wonder if this is because of all the asymmetry I’ve built in ?
Maintaining Asymmetry
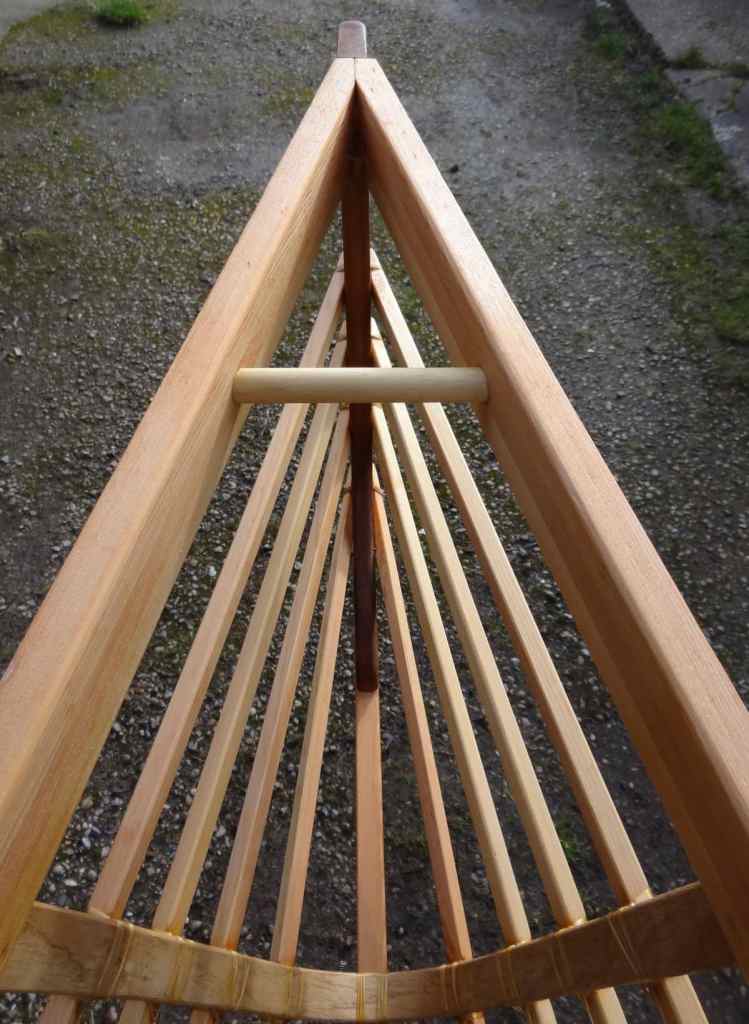
Concerned that I may lose some of my gunwale asymmetry fore and aft. Glued in 16mm hardwood dowels, pinned with 3mm dowels. I’m not intending to nest a smaller canoe so they won’t get in the way. Also convenient handles and tie-down points on a roof-rack.

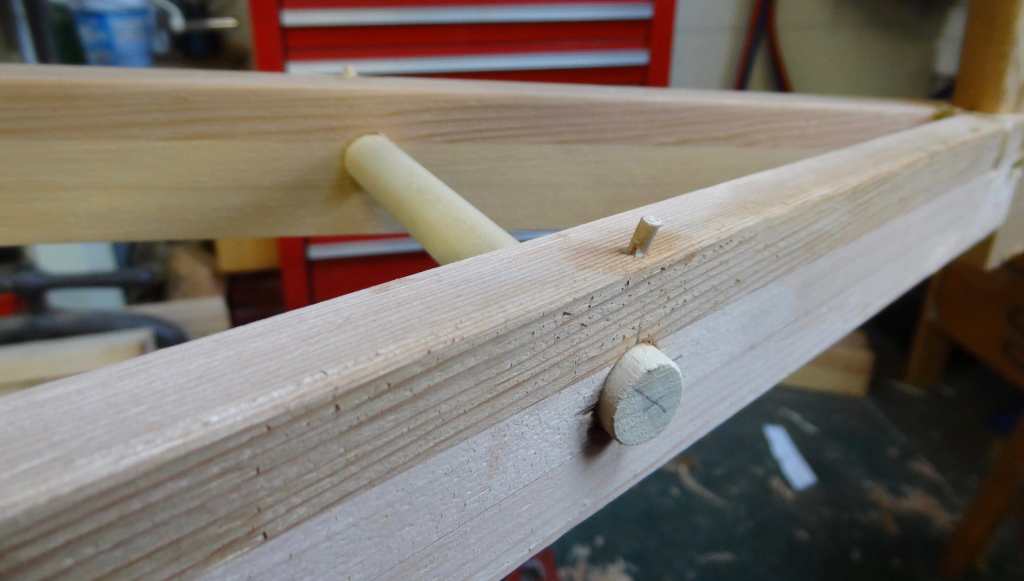
Will obviously be cut flush !
Removing Temporary Spreaders
When I removed the spreaders the centre remained at 28″, whilst the 25% stations gained a fraction. However I fear that skinning will spread the gunwales. I guess the gunwales should move inwards a little at this stage to compensate for the skin tension.
May have to remove my dowel ‘handles’??
(Next Day – removed them – didn’t make any difference !)
Frame Oiled and Drying


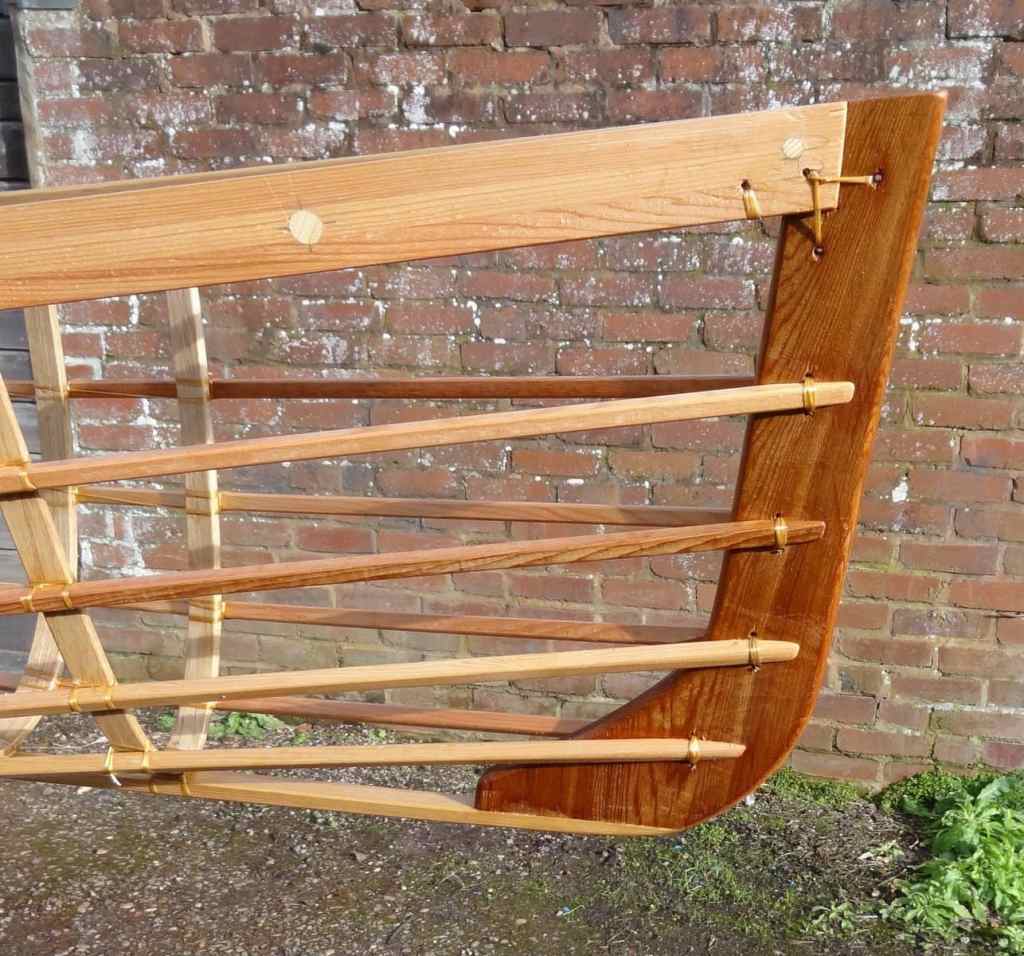

Asymmetry
Sheer = 1 ½” more at bow
Rocker = 1″ Aft – 1½” Forward (Before Skinning)
Max. Beam = One Rib (5″) Aft of Midships
Gunwales = Forward 25% station 1 5/8″ less than Aft 25% Station
Bow Stem Heel 6″ Radius
Stern Heel 4″ Radius
Bow angle 7°
Stern Angle 5º
Skinning – Part 1
Using 850 Primo Nylon.
Only chose this because it was available in the UK.
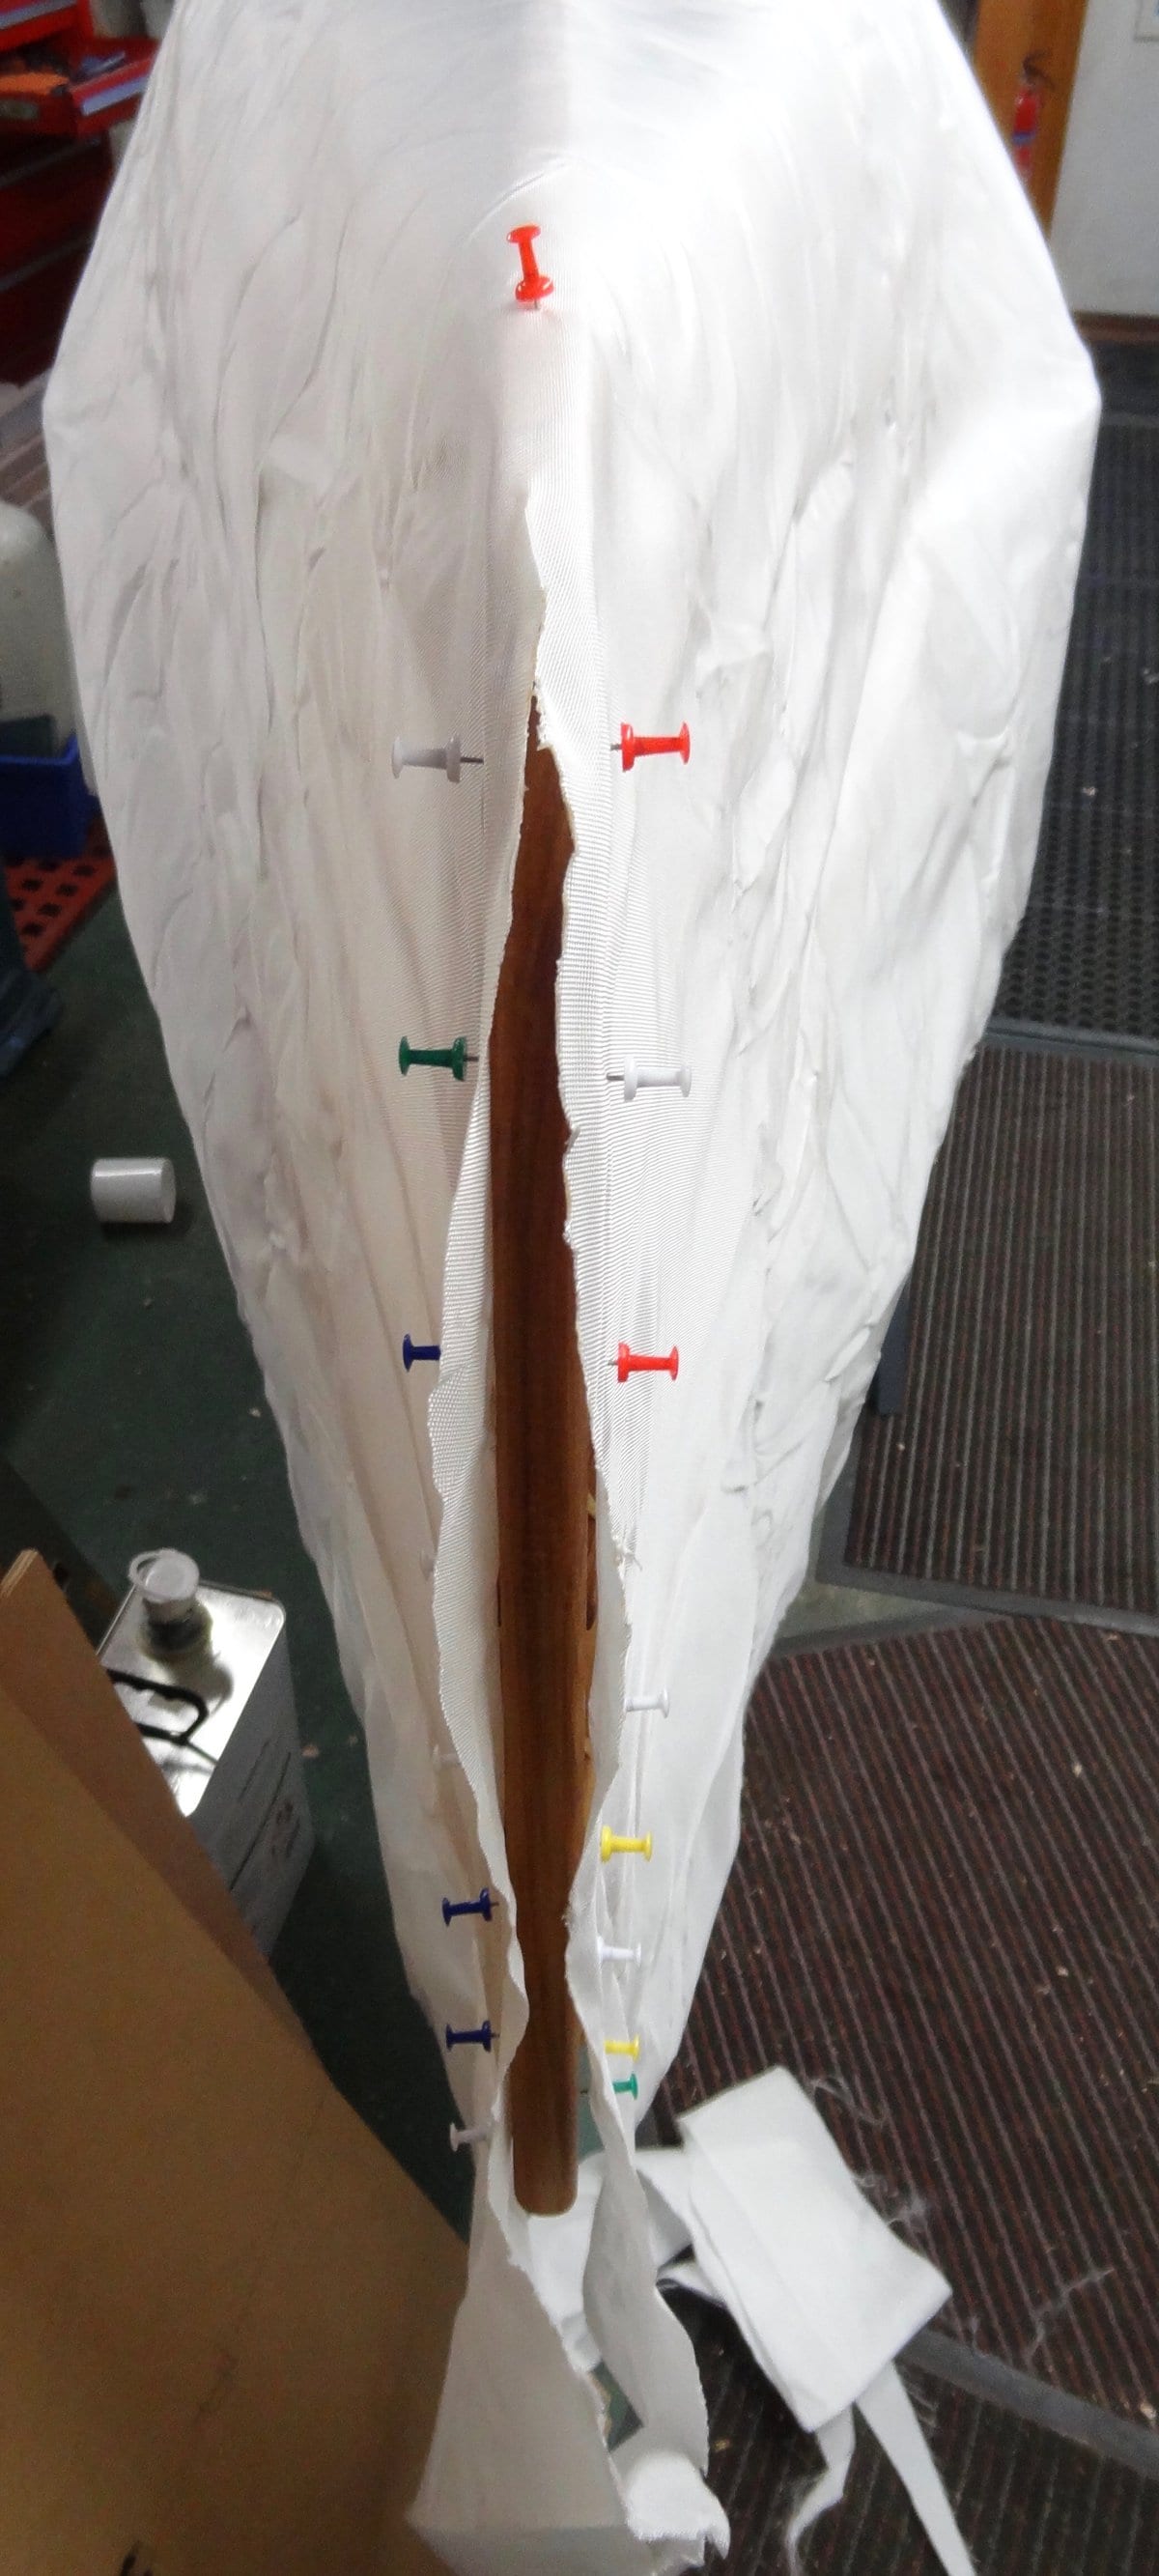


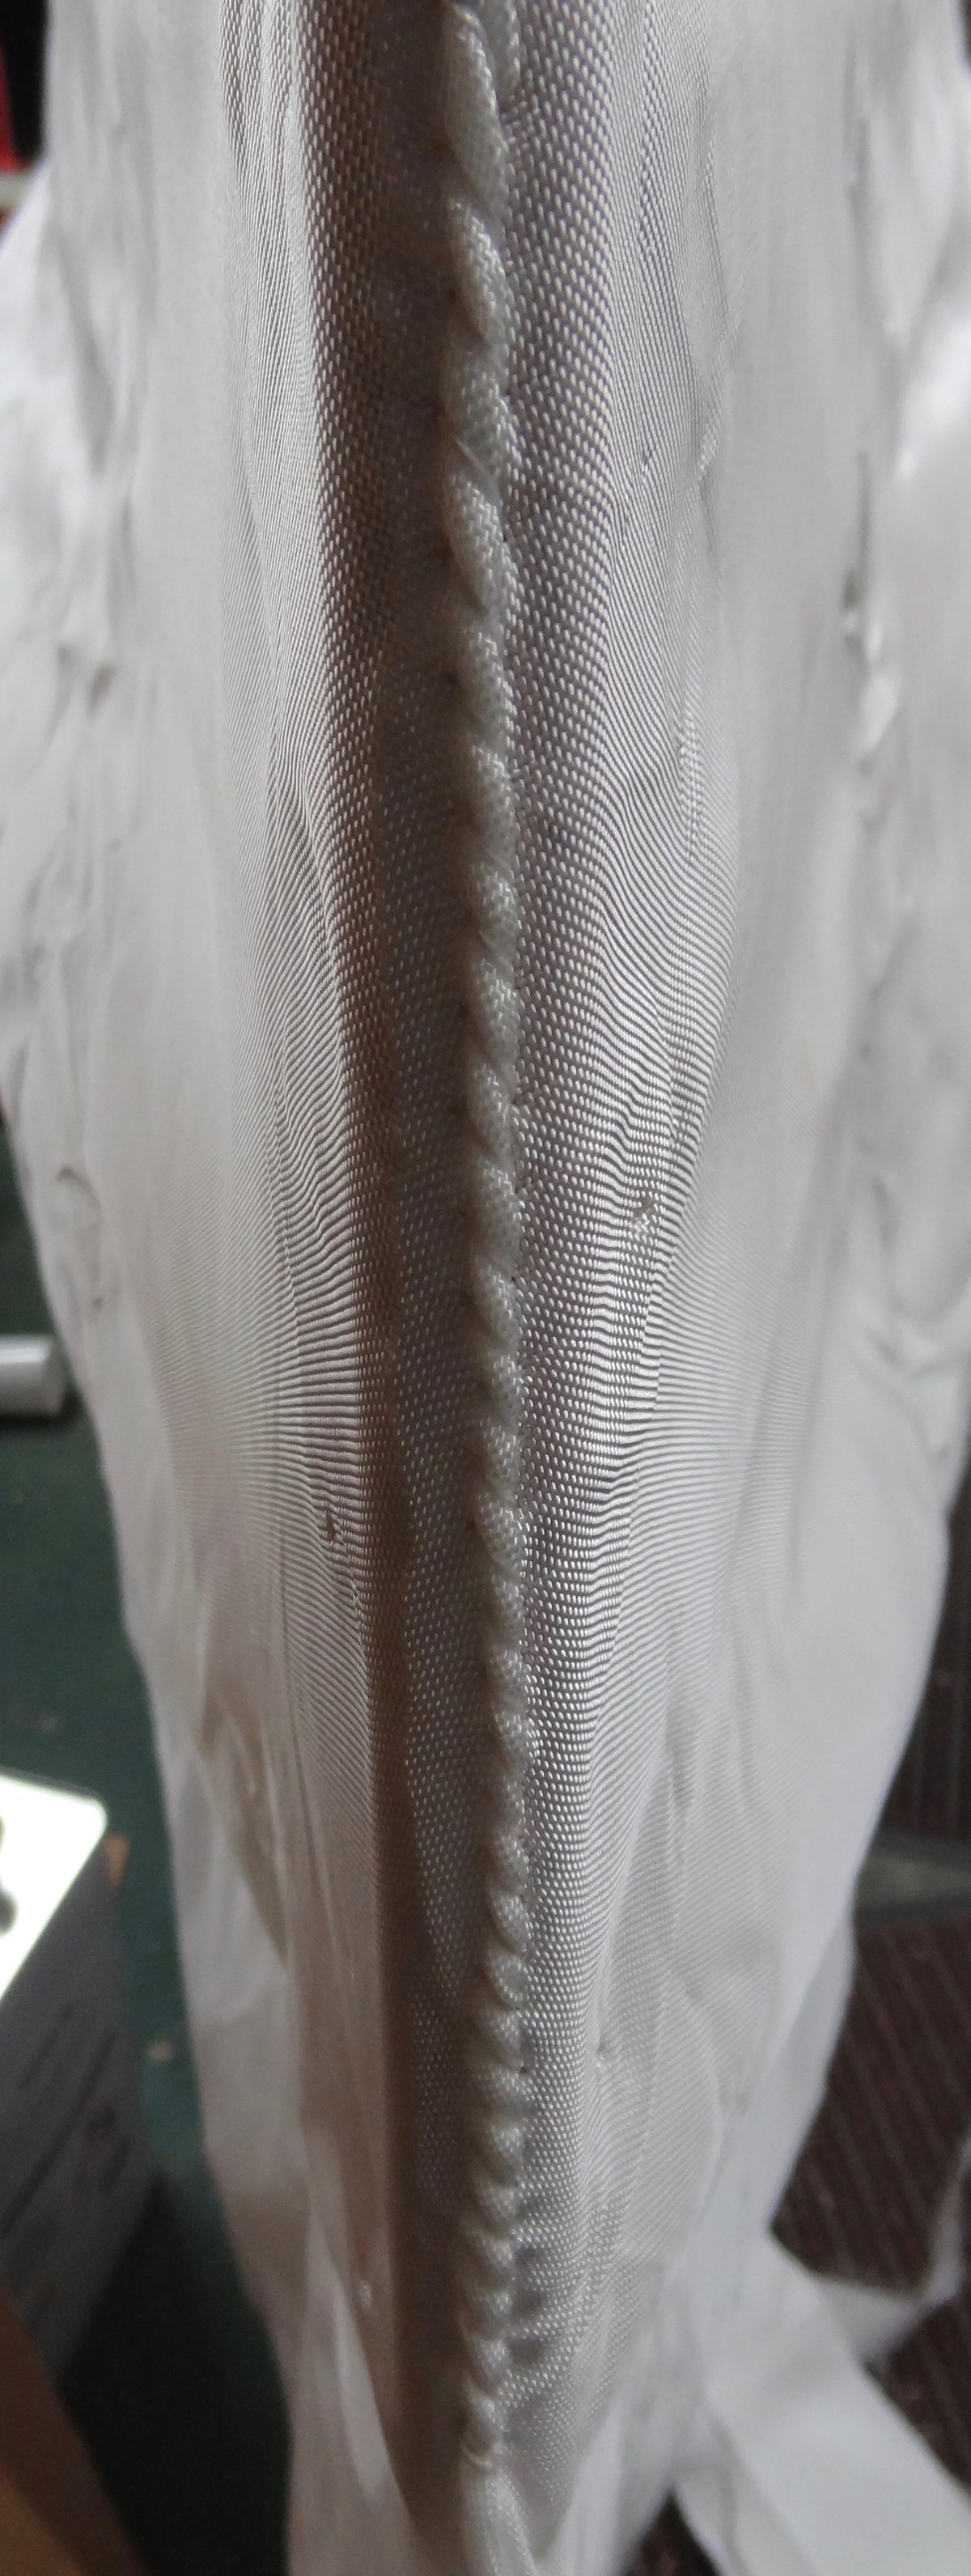

Skinning – Part 2
This is the part I was most apprehensive about. Needn’t have worried……all went to plan.


Getting a 4.2m length of oak for the rub rails would have been expensive. I scarfed two lengths of leftover rib stock instead;


Spot the joins !

I didn’t oil the rub rails at this stage, to ensure the masking tape adhered well.

Weigh In
Weight before adding goop = 9.26kg
(For anyone in Liberia, Myanmar or the USA, that’s 20.4lbs)
Goop to Go

Chose Corey’s goop for its environmental credentials. The Greek yogurt is not an extra ingredient …..it’s my mixing pot. Must covert fl.oz.(US) into metric for my measuring pots ….dig out some old paint brushes and mask the gunwales.
I chilled down the workshop for skin stretching so the temperature is currently only 13ºC (56ºF). I’ll bump it up to around 20ºC (68ºF) and get the humidity back to normal with the dehumidifier, before gooping tomorrow.
Goop Day
Storm Eric blowing outside but 22ºC (72ºF) in the workshop. Relative Humidity outside 97% …….workshop 45%RH.
All went according to plan. Did a separate left and right coat with an overlap at the keel. A third mix gave double coating on the sides and triple on the keel. Finished with extra on the stitching and at either end of the keel.
Started with a 32floz pot of ‘B’ and a 16floz ‘A’ (Total48floz). Used about 34floz with roughly 14floz left over.


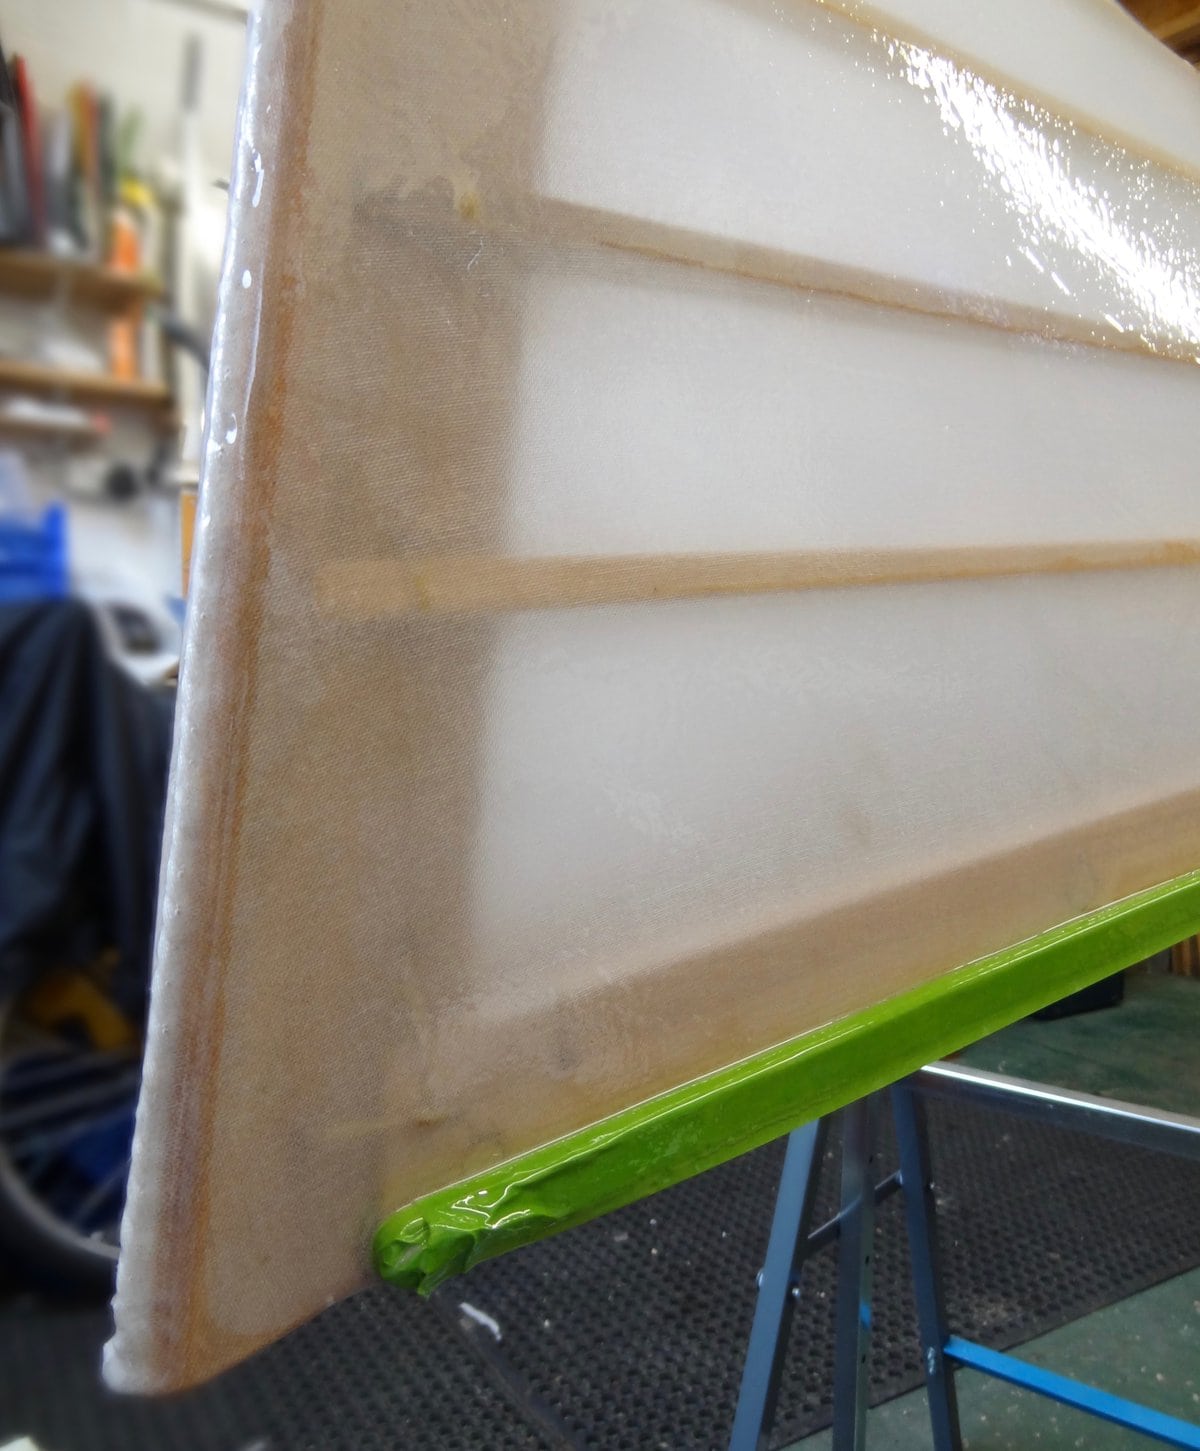


No drips or runs and shiny all over …….hopefully it will still be like that in a few hours.
Next Day
Baked overnight. Still looking good.
Weight now 9.8kg (21.6lbs). Not bad for a 4.17m (13’ 8”) canoe.
Oiled rub rails.
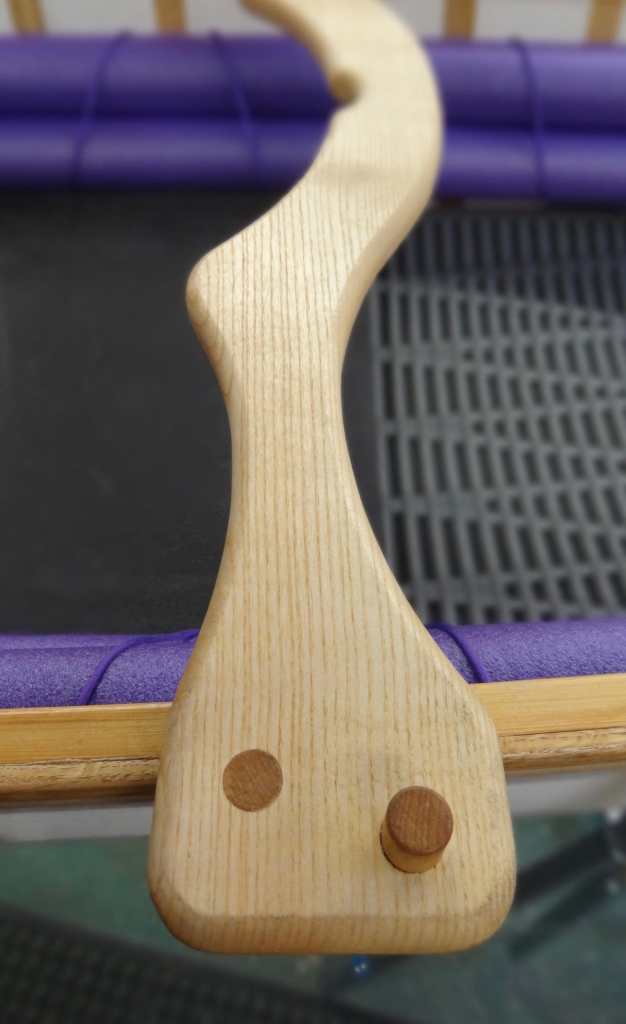
Portage Yoke / Backrest

Well seasoned, locally sourced English Elm.

Launch Day
Big launch day at University Rowing Club Pontoon on local canal.
(No…..I didn’t choose the venue because it has a defibrillator!)

It floats……..

Couldn’t get 4″ Pool Noodles so had to double up on smaller ones.

Already had a kayak seat….fits well.

More stable than I was anticipating …….

Exeter Ship Canal…..

Trim looks OK fore and aft…..

Big grin says it all……..

New Seat
Kayak seat OK but inconvenient for portage so I tried the simple option…1″ closed cell foam;

Trails – Day 2
Tested new seat today ……works well. PFD acts as back padding. Stays in place for portage. (Bungees not shown in pic. above)


Pleasant trip on canal. Tracks beautifully…..didn’t lose much rocker during the build….still about 1½” fore and 1″ aft. Breezy at times. Surprised how it catches the wind, compared to my kayak. I have no experience of canoes but I guess this is what they do. Not a problem because my intention is to use the “66” for camping trips…. one way …..down rivers.
Finished the day by capsizing…..Oops! Luckily I was getting out at the pontoon and was hauled out by two nice students ……thanks guys 😉
Must fit self-rescue loops tomorrow !
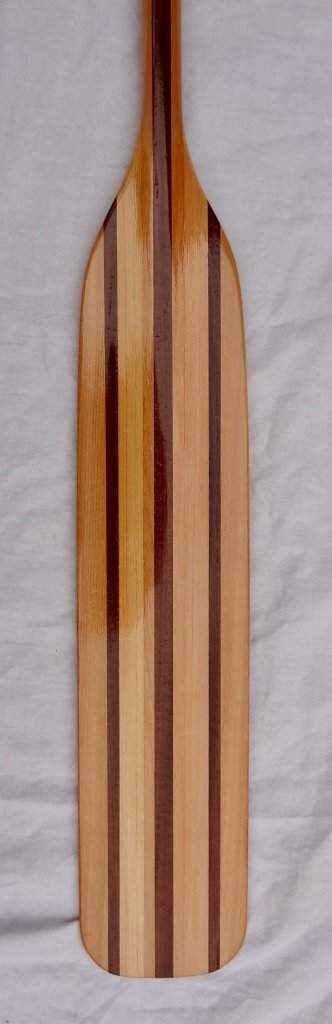
Paddle
Not been canoeing weather …..so decided to use leftovers and up-cycle some old scrap wood;


River Wye Camping Trip – September 2019


Encountered several small rapids on this trip and shipped a little water.
Made spraydeck;


Note new comfy seat back pad and extra buoyancy noodles.
Also Sail;


0.8m area.
Spinnaker sailcloth.
Tapered tubular fibreglass mast and boom.
Camping Trip – Kennet & Avon Canal – June 2021


January 15, 2019
Wow! Gobsmackingly amazing! Can’t wait to see it and try it out I hope. H. x
January 31, 2019
Very impressive!!
February 7, 2019
It’s coming on nicely. When is the launch?
February 7, 2019
Nice job Peter. You used proper woods and the frame looks great. I am just skinning my 16ft 66 canoe now. Thanks for sharing.
February 11, 2019
Could not miss your smile. Nice looking canoe.
February 12, 2019
Peter, why did you pick the smaller tubes on each side rather than use Brian’s 4 inchers?
February 12, 2019
Afraid I simply couldn’t find any 4” in the UK.
Good luck with your launch.
February 16, 2019
Canoe looks great, re the foam… whilst 4″ pool noodles seem impossible to source here you can get 6″ ‘roller foam’ for gyms & yoga. probably too big, but with 2″ cut off to make a flat on one side they might work well.
February 16, 2019
I found on line at Workoutz.com . Do not know if the ship across the pond.
February 17, 2019
Workoutz charge a crazy amount for shipping to the UK !
February 12, 2019
Well done Peter.
Happy to watch!
February 12, 2019
Wow!!! I’m so impressed!!!
February 14, 2019
Beautifully done – I am impressed!
A huge DTM (Don’t tell Mother) item, no wonder she thinks we have a death wish….
Can you make one with stabilizers for your little sister?
April 3, 2019
Hi Peter
I’m thinking of building one of these 66 canoes in the UK and wondered where you went to find supplies in particular the skin, the gloop to coat it and stainless steel Staples.
Thanks
Ewan
April 8, 2019
Skin and urethane from Ant at Shipshape Boatbuilders, Bristol. He’s on this blog site.
Stainless staples from eBay.
Where in the UK are you?
July 13, 2020
Hello just seen your build, looks amazing. Im also in Exeter snd so the link to suppliers is fantastic, judt wondering if you know how much the build cost you?
July 13, 2020
Materials about £410. Machining your own timber saves a lot….paying somebody to do it could double the cost!
Wear and tear on tools, eg. router bits, circular saw blades, etc. probably another £100.
Plus paddle, buoyancy aid, dry bag, etc. ??
September 5, 2021
Hi Peter I been looking at the Cape Falcon canoe designs for a long time and now need a lightweight canoe. This could be the answer.
Your account of building the canoe is great and you have made a beautiful boat.
I have tried to find the white ballistic nylon in the UK but have failed. Where did you source it?
I am talking to a friend, he is timber miller and he should be able to get the oak for the ribs. He’s keeping an eye out for this.
September 5, 2021
Imported Nylon skin and urethane from Ant at Shipshape Boatbuilders, Bristol.
He’s on this blog site. Or just Google Shipshape Boatbuilders Bristol.
September 5, 2021
Thanks Peter, I’ll contact Ant.
Doug