This is my third build using Brian’s system. I love building this way; the freedom and flexibility to play with the formula and manipulate the shape of the boat is liberating. It is also the first time that I’ve made any attempt to really record my build process. I was surprised at how hard it was to remember to stop and take pictures and write things down as I went, and it taught me a lot about what I’m doing and how I’m doing it… and how messy my shop is. Anyhow, I’ve really enjoyed the whole process and am already ripping oak ribs for my next build!
Getting started: pondering and figuring, supplies
I spent some time figuring out what it was I wanted to build, gathering supplies locally, ordering bending oak from Zena Forest Products (great people to deal with and wonderful wood, but I’m not proud to be shipping chunks of wood across the country… working on a local source now) and skin etc.

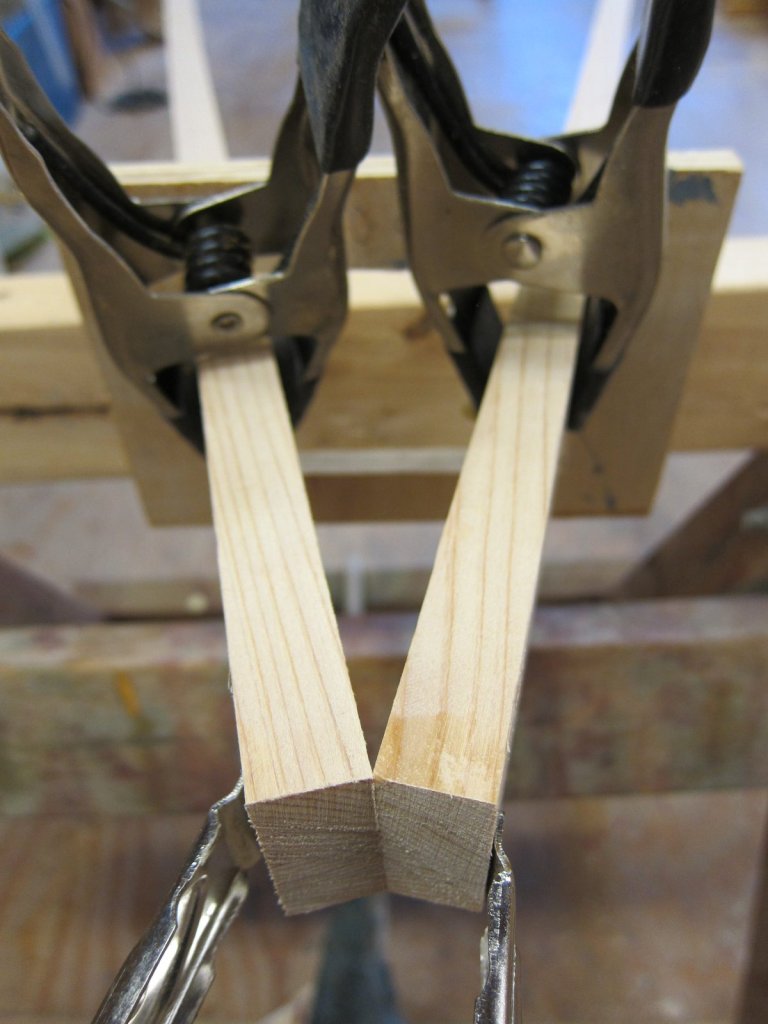
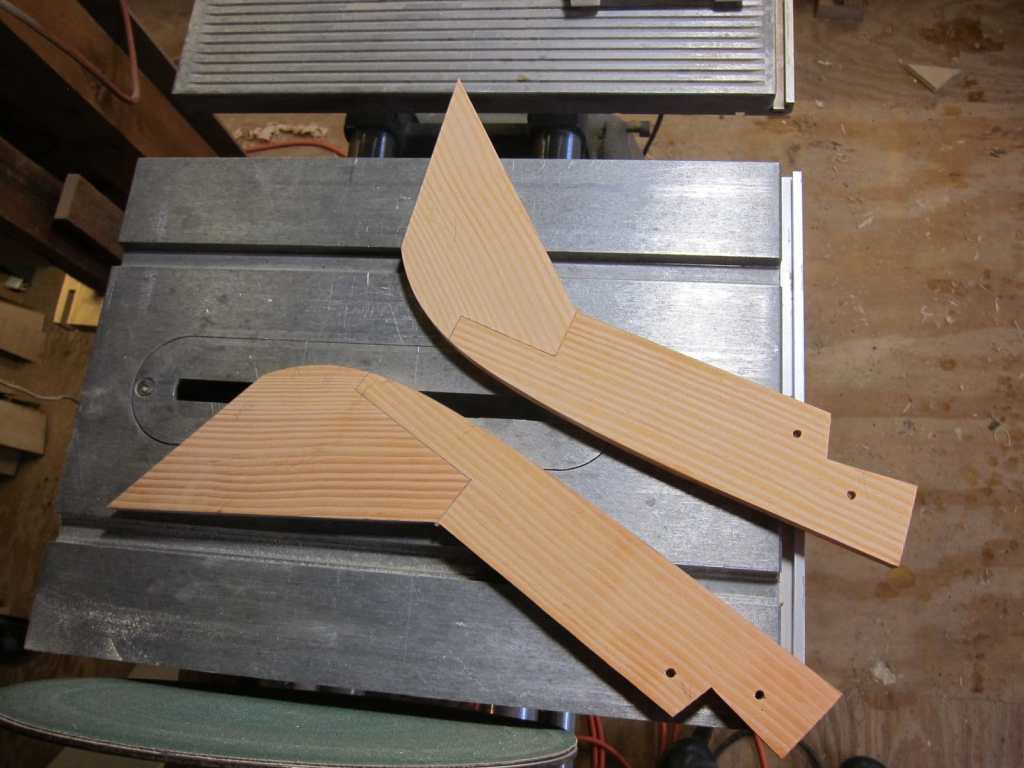
Making stem blanks
In the past I steam bent and laminated my stems, but this was messy and time consuming and probably overkill for these boats. I decided to glue up a two piece stem that I cut out of a piece of douglas fir, paying attention to grain direction and maximizing glued surface at the joint. This first step just gives the rough blank that I will sketch my final shape onto later in the build.


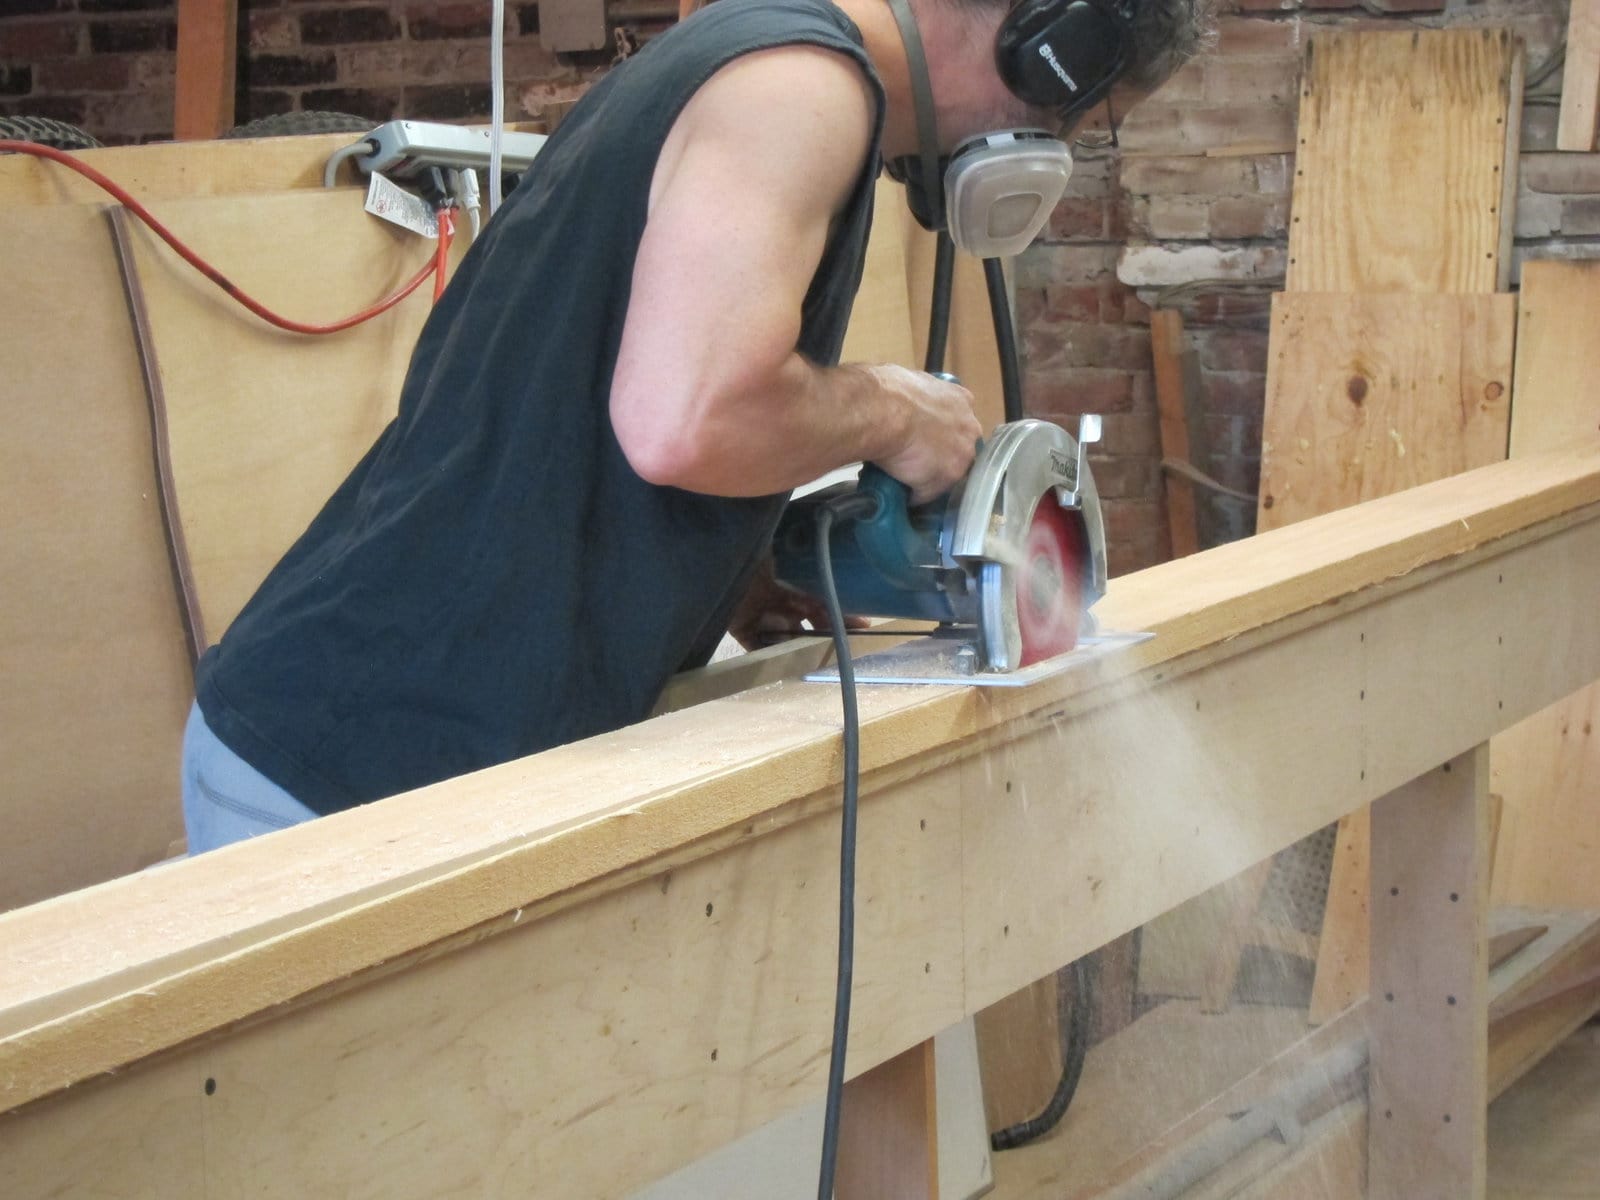
Ripping the long parts: gunwales, stringers, and keel
I have the benefit of a nice straight strongback that I used back when I built boats on forms before switching to Brian’s technique of free bending ribs. The strongback has been relegated to it’s current role as an extremely long and skinny bench, but having a long straight and level edge in the shop is immensely useful. My current favorite use for it is as a reference edge for my circular saw when making the first cut on a board for my long pieces. Here I’m starting into a 5/4×6 cedar board, using a simple guide extension that I made for the saw’s fence.


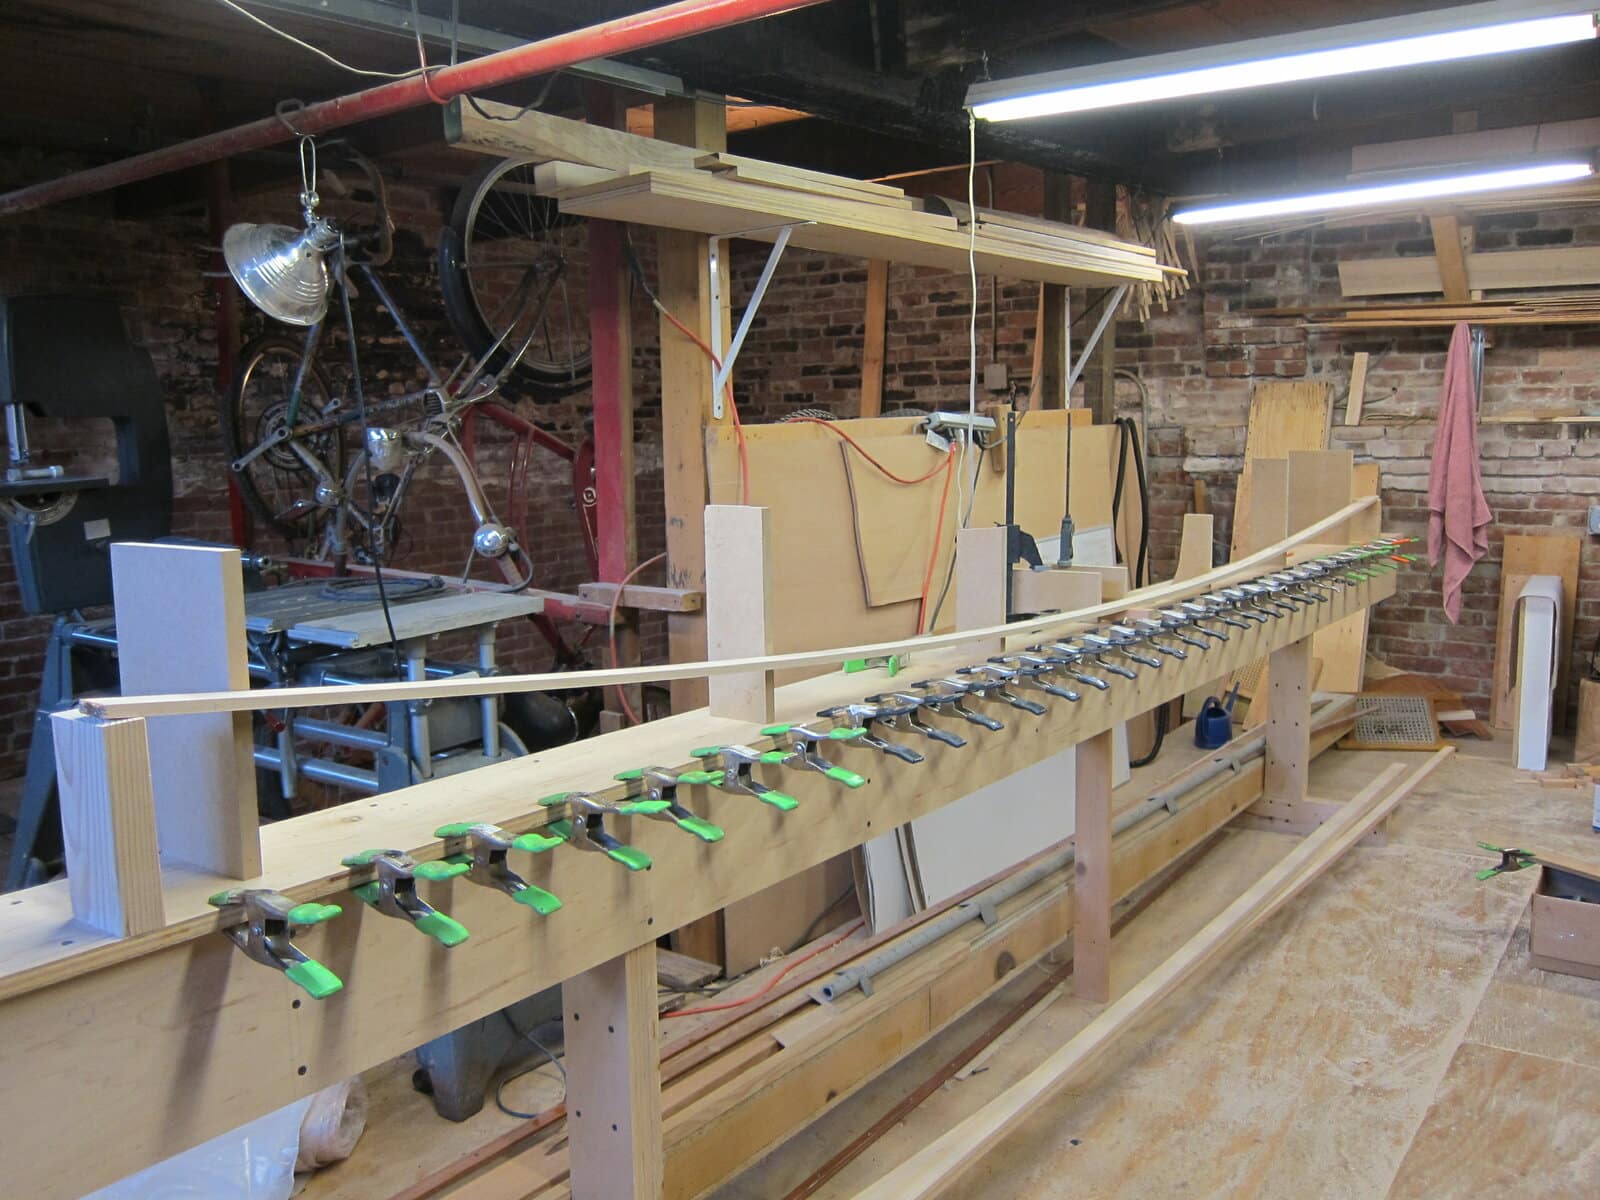
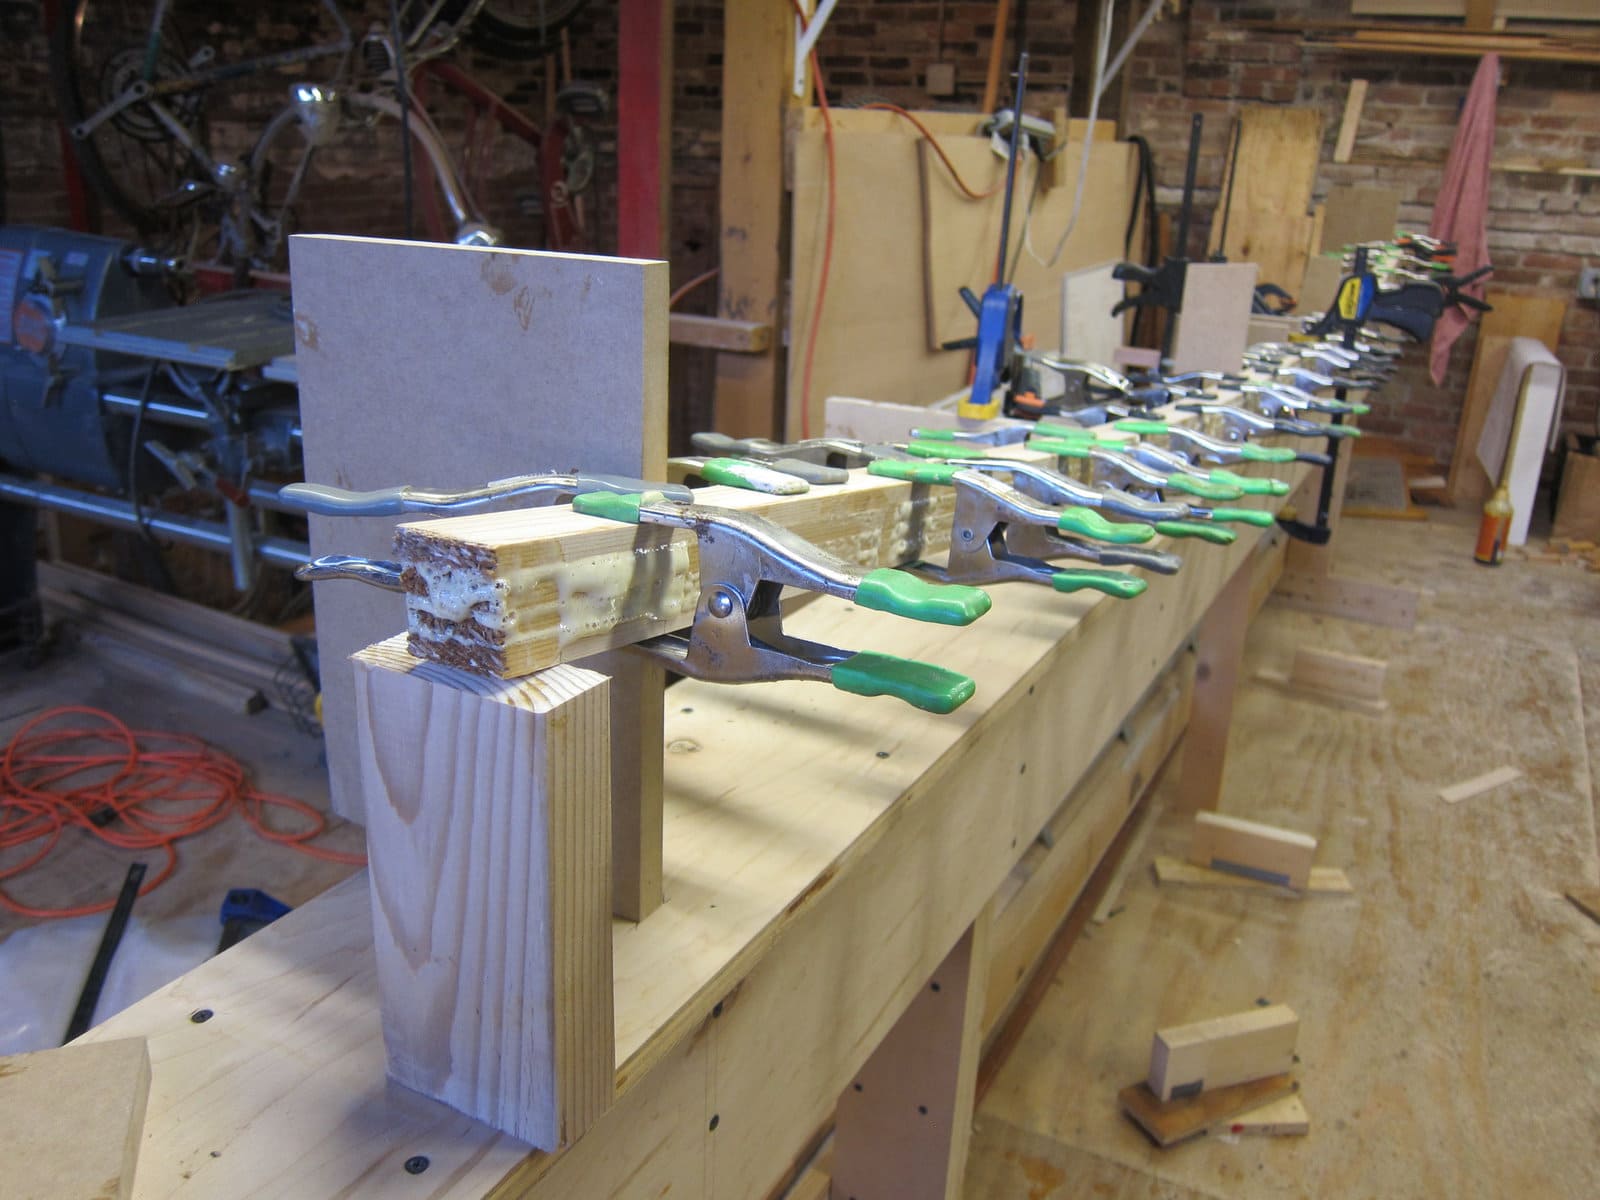
Laminating gunwales and more stem work
Again – it’s really nice to have this long and straight reference edge. I did four laminations instead of the usual three, just because I have less wastage that way with the stock dimensions that I have.
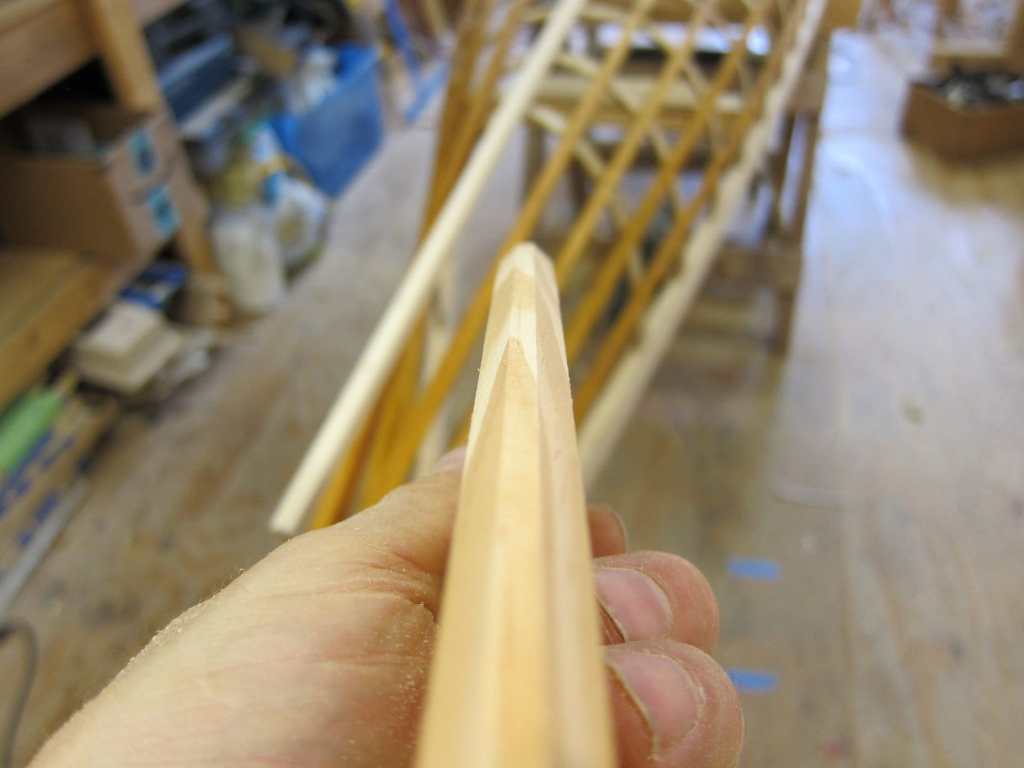
While waiting for the glue to dry I continued working on the stems, running them over a flat sanding board to make sure they were perfectly flat on one face, then running them through the planer and drum sander to thin down to final thickness.
After splitting the gunwales I’ve got a nice pile of parts.

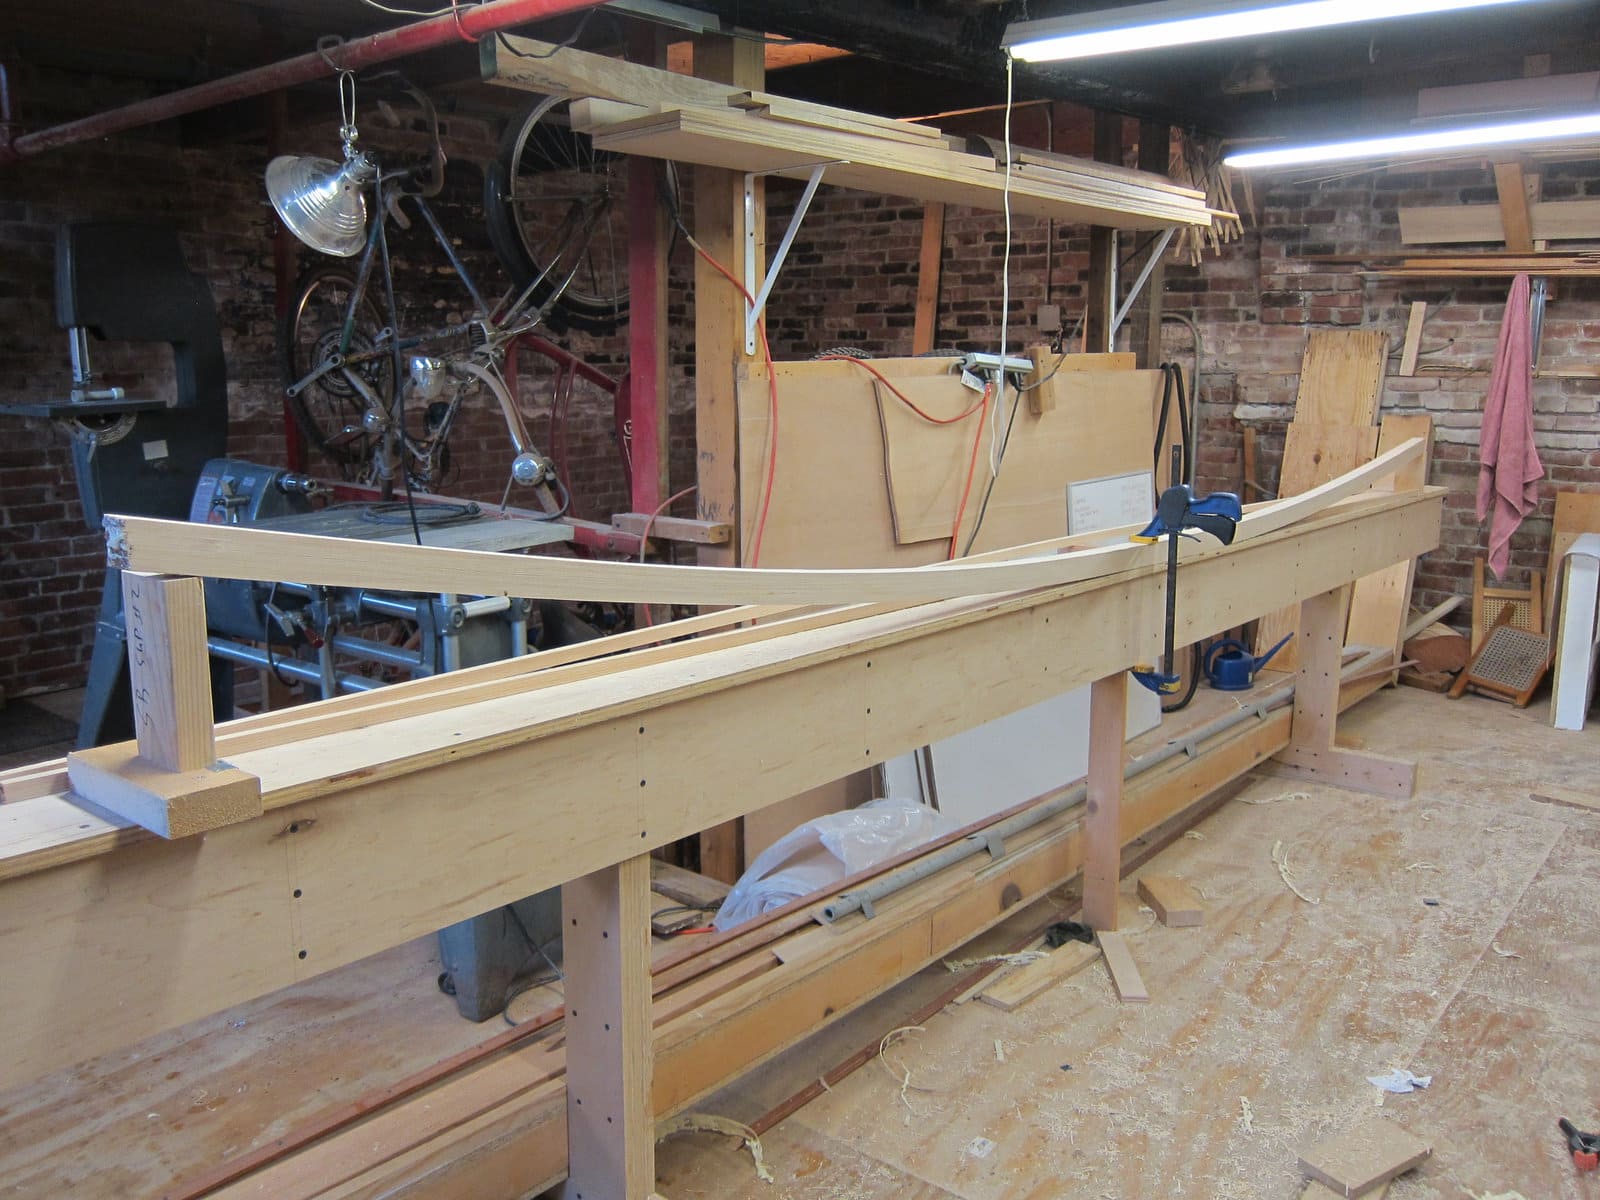

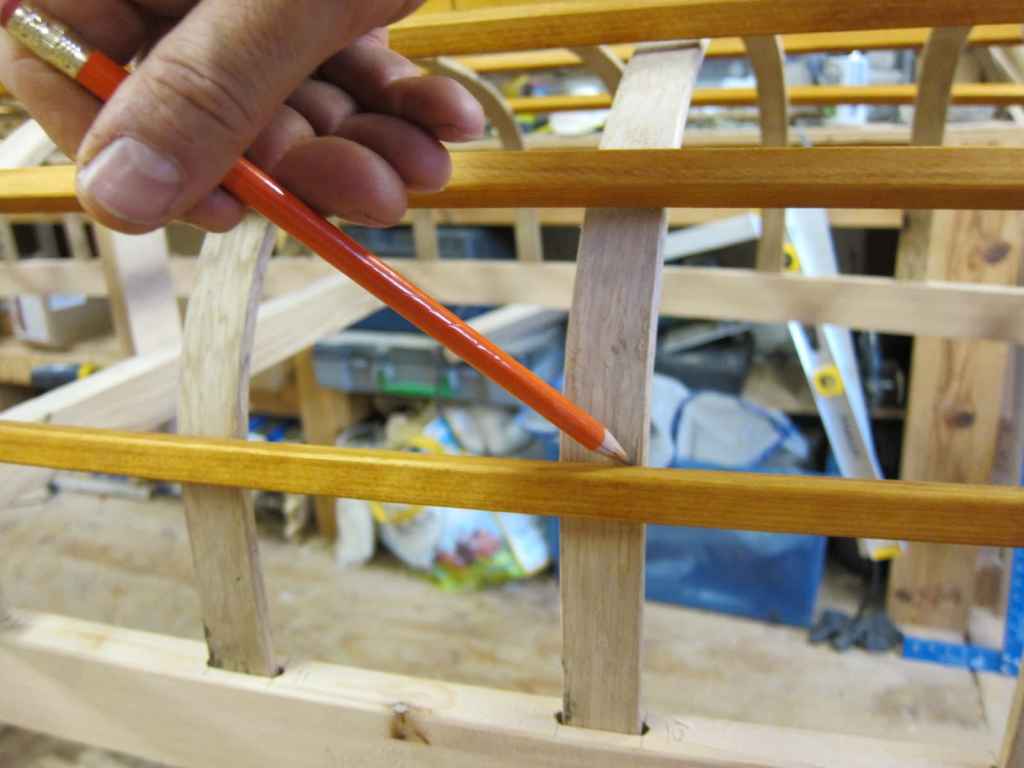
Trimming gunwales and routing mortises, measuring sheer heights


Building the deck
Installing spreaders and capture forms, kerfing and lashing gunwales.


Setting the rockers
I’ve noticed that with the white cedar that I’m using the lashing can slice along the grain when pulled tight on the gunwale-stem attachment, so I picked up these little brass inserts from the plumbing department of a big box store and glued them in, being careful to sink them far enough in so the flange doesn’t abrade the lashing.

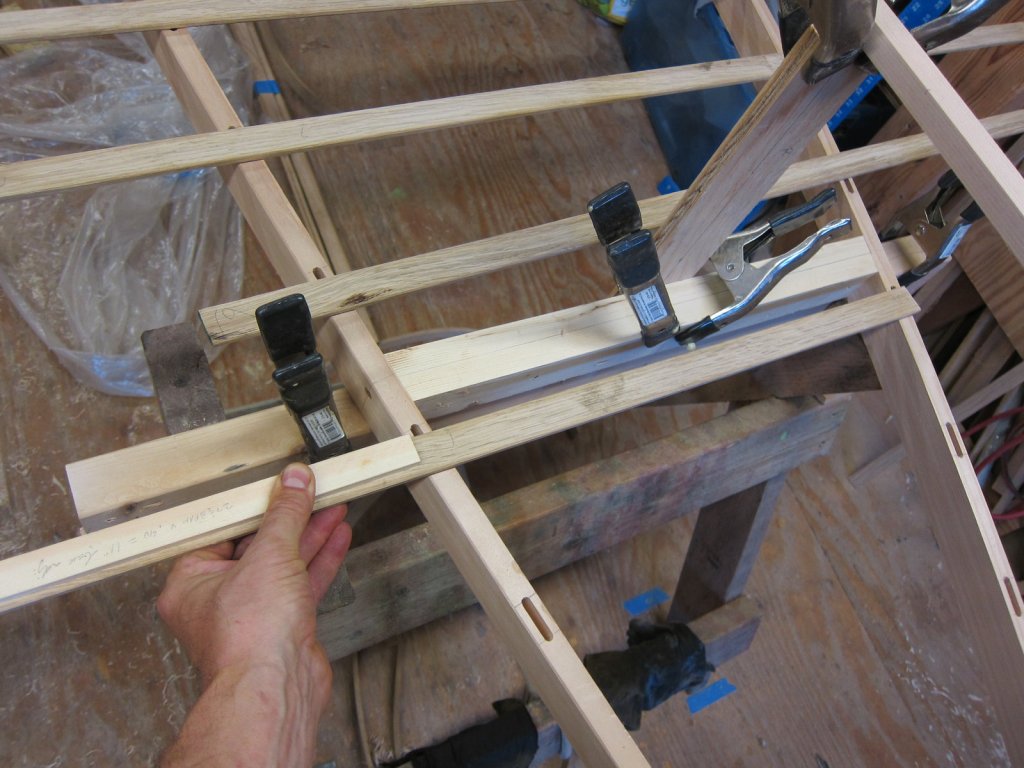
After temporarily attaching the stem blanks and the center support for the keel, I added in support blocks at the intermediate spreaders. My keel had been sagging at the intermediate points, creating a peaky rocker at the center of the boat. This took some calculating involving the original shear and rocker measurements to get the right height for the support blocks, but it worked. I’m not sure I’ll bother with this in the future, as it seems that I always loose some rocker in the center of the boat as the build goes on, so maybe having the peak there is a good compensation.

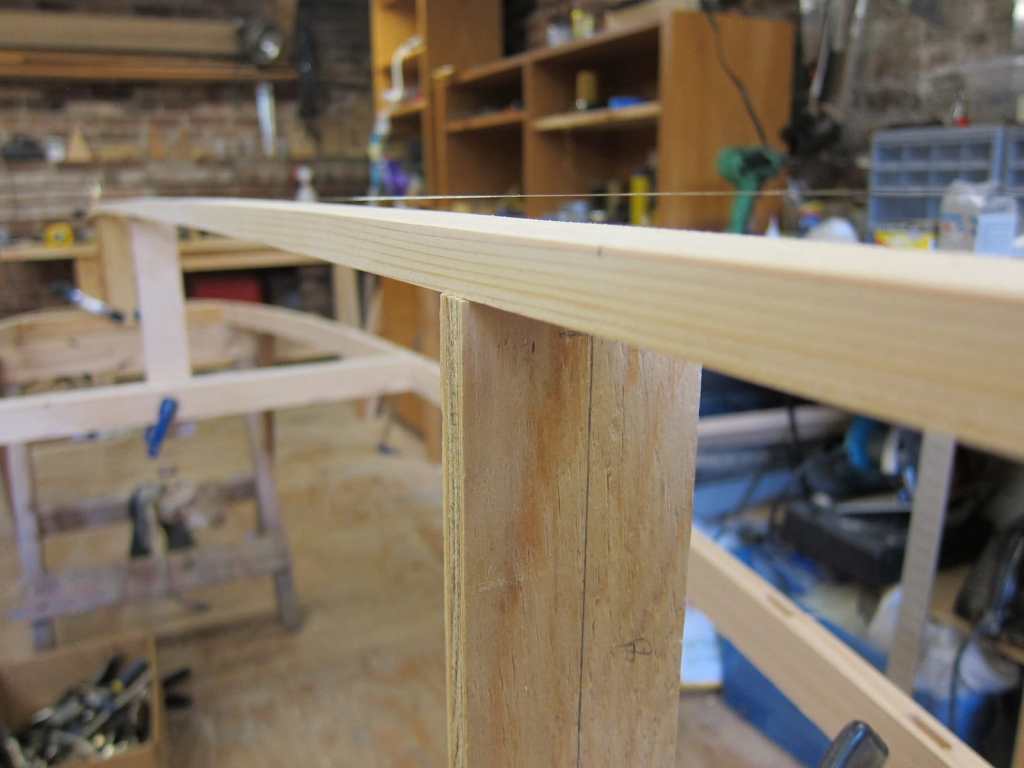
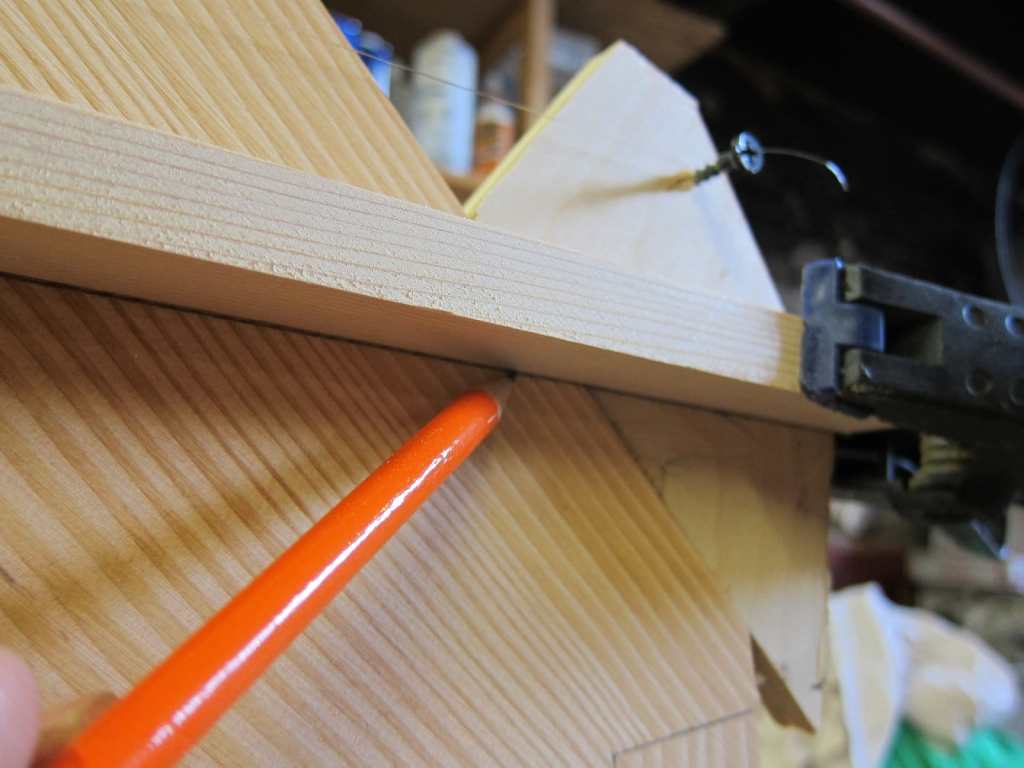
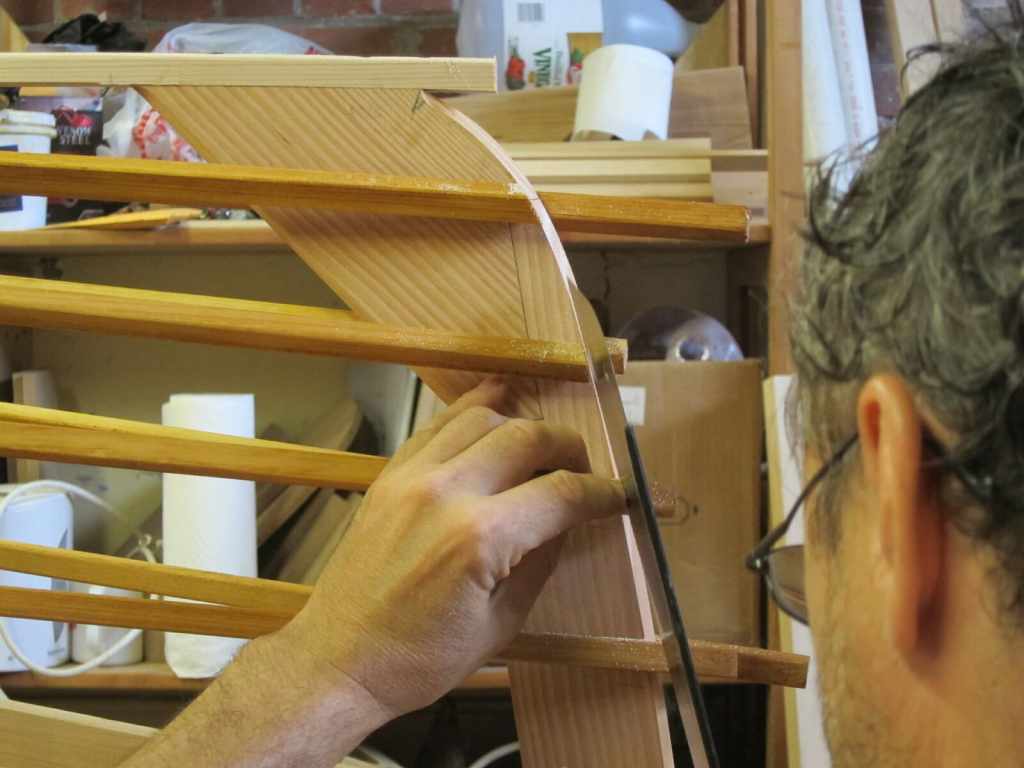
Screws set in the stem blanks gave me a straight reference line for checking my rockers against the original measurements. Then scribe the keel line on the stems, remove stems and cut line on band saw, and temporarily reattach stems to gunwales and keel.
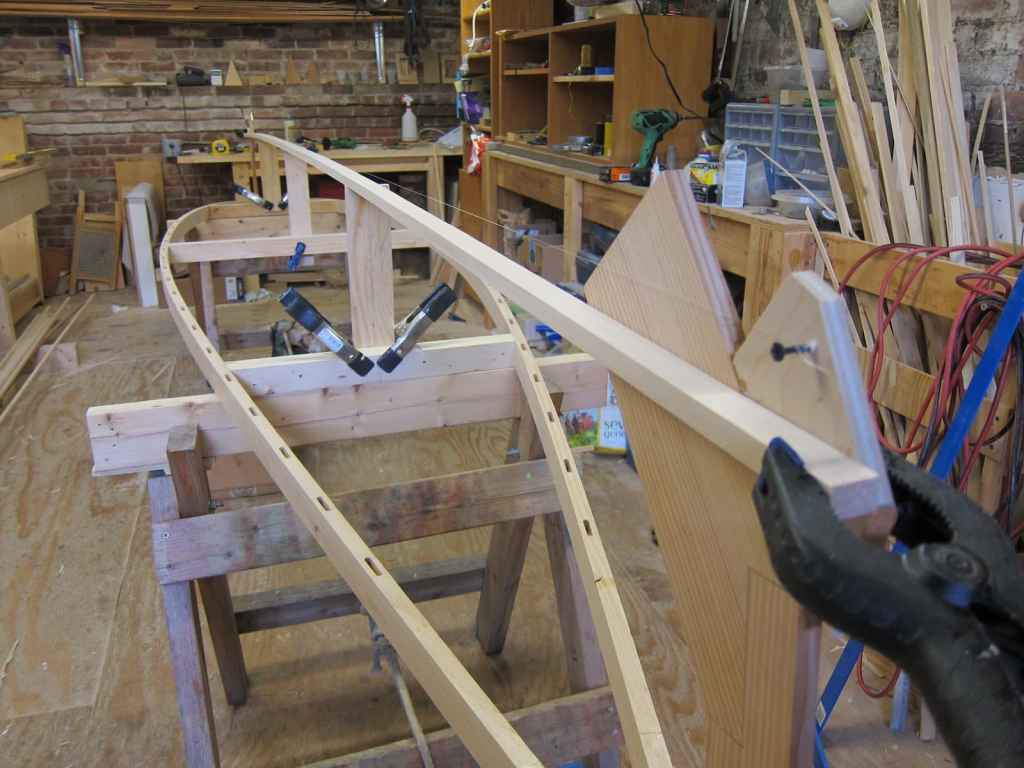

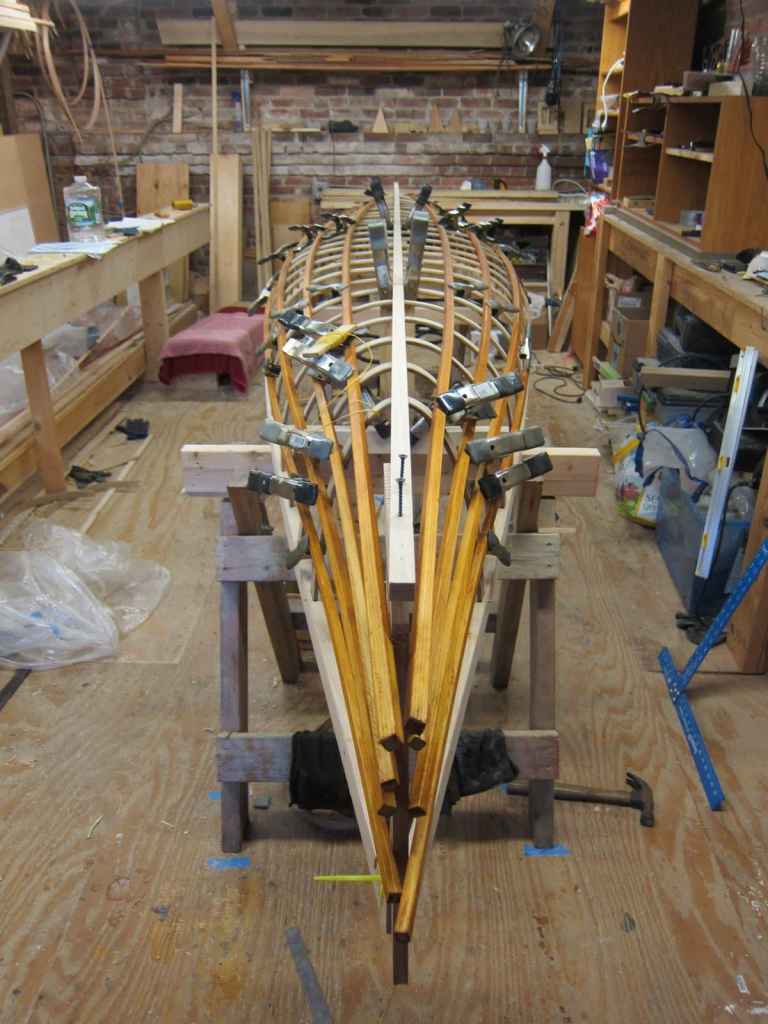
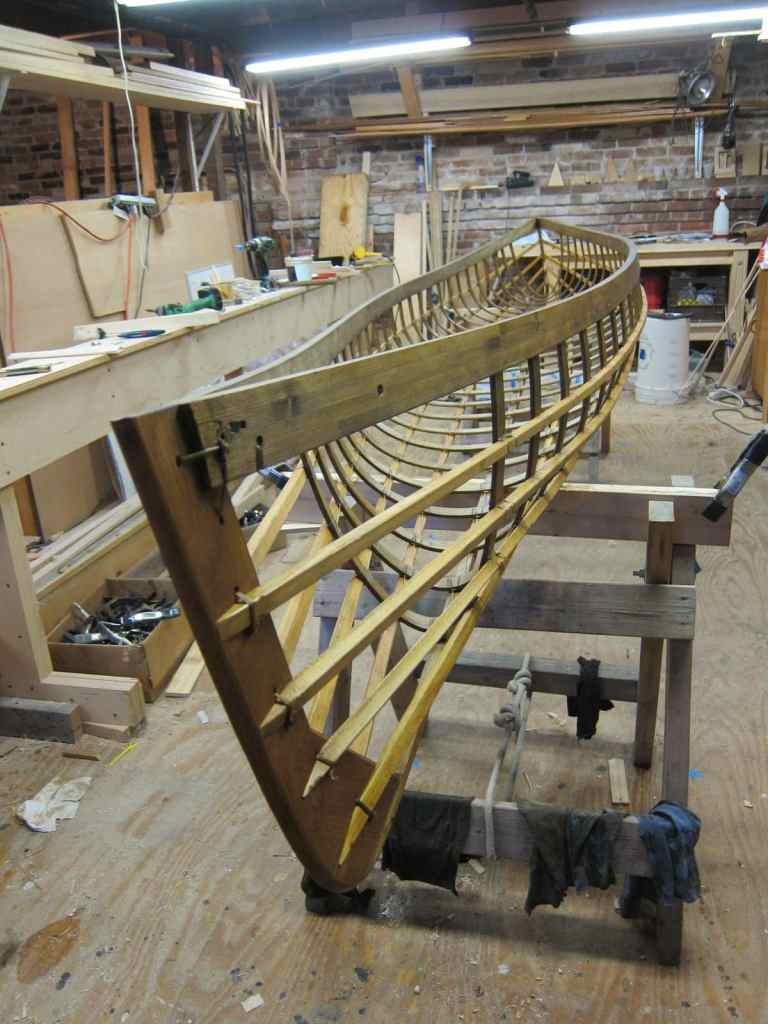
Bending in test ribs
I had some old rib stock from previous builds so I used that for test ribs instead of using the precious oak from Oregon. I went for a pretty flat bottomed shape for this boat. Apparently the risk with a long rib length to beam ratio like this is that the ribs can force the gunwales to twist inward, reducing the sheer and the rocker. I decided to risk it and it worked out.


Prepping to steam bend
Ribs ripped. Rib measurement stick calculated and made. Ribs measured and cut to length and sharp edges planed, then length checked and mortise fit checked… steam box ready…


Steam bending ribs and clamping stringers
This is the first build I’ve done without breaking any ribs. Some of this is a little bit of experience gained; more of it is due to having amazing bending stock.

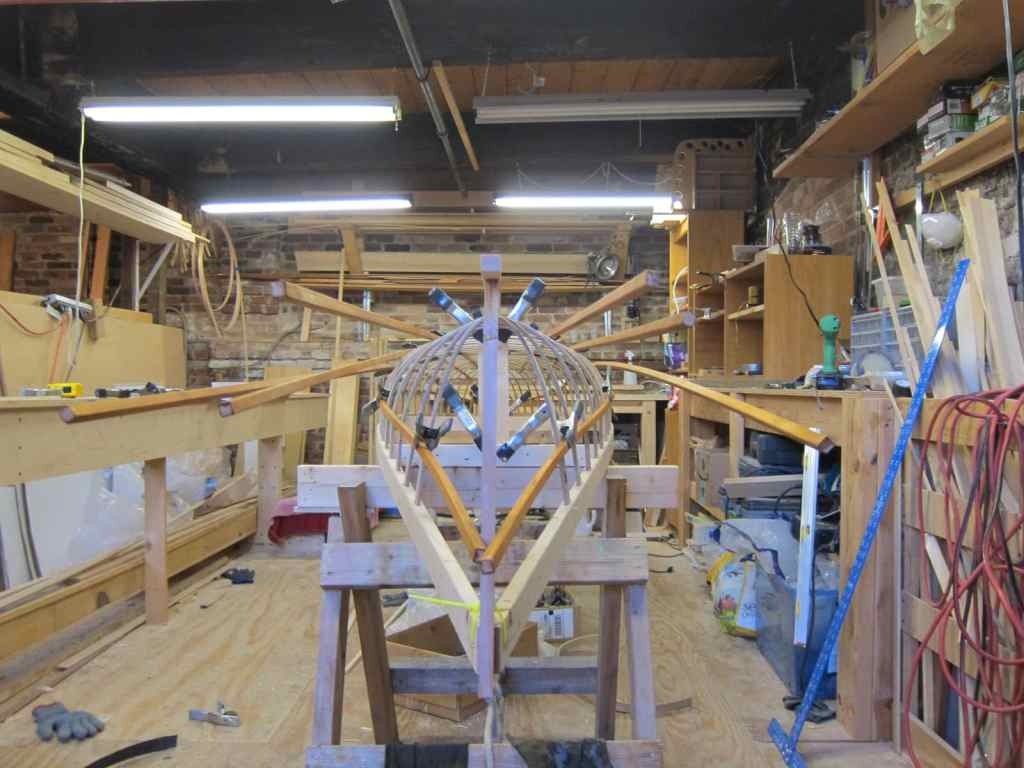


Lashing stringers
When I lashed on the stringers I noticed that the larger ribs in the middle of the boat had pulled down from the keel which would result in a dipped keel. I’m still not sure why this happened, but I do have some theories. I put some heat and muscle on a few of them to get them closer, clamped some others, and shimmed many of the ribs at the keel. I did this at this point, before adding progressive rocker or pulling the support blocks from the keel, so that I wouldn’t lose my reference points for the planned rocker in the keel.
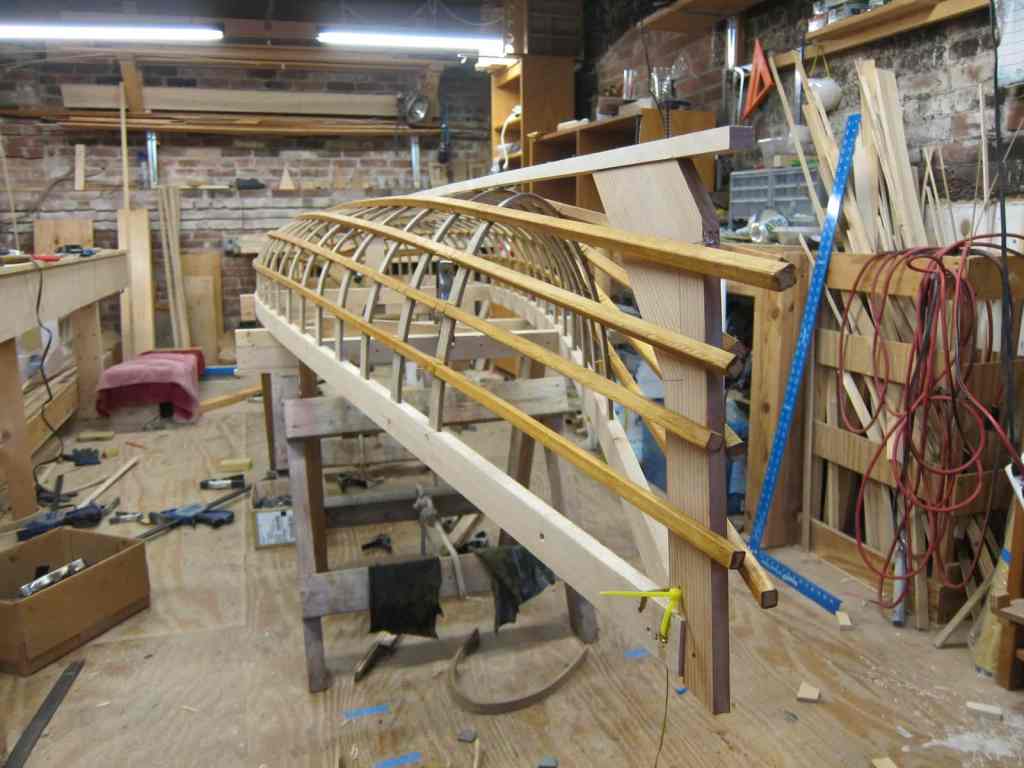


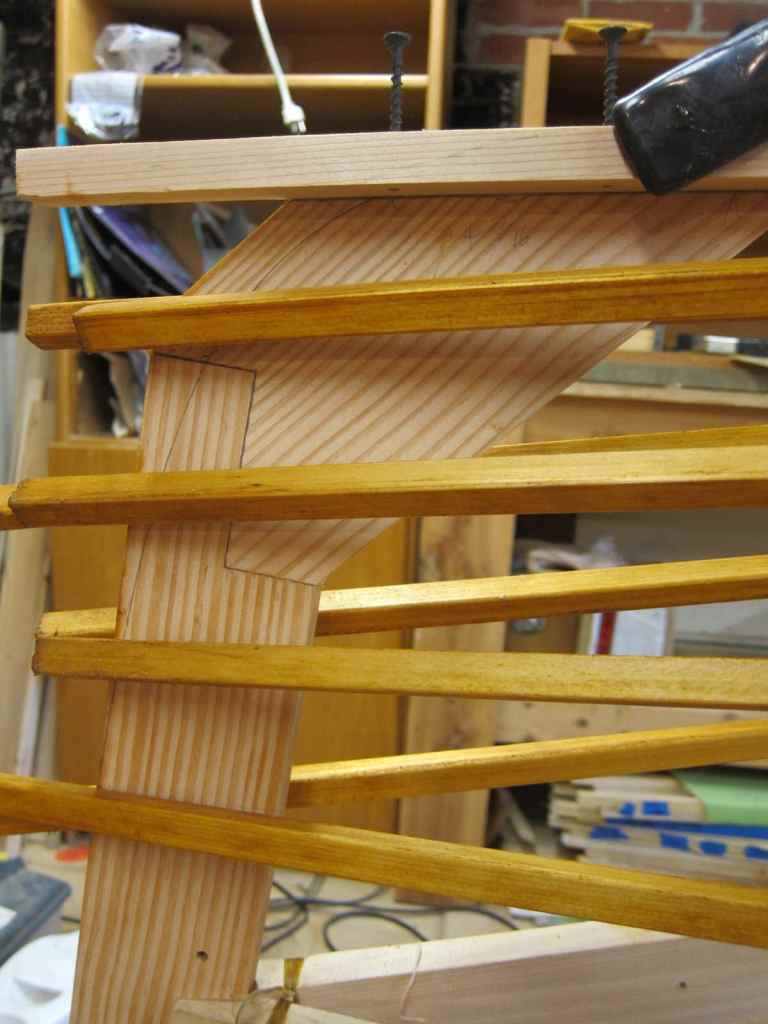
Final stem shaping
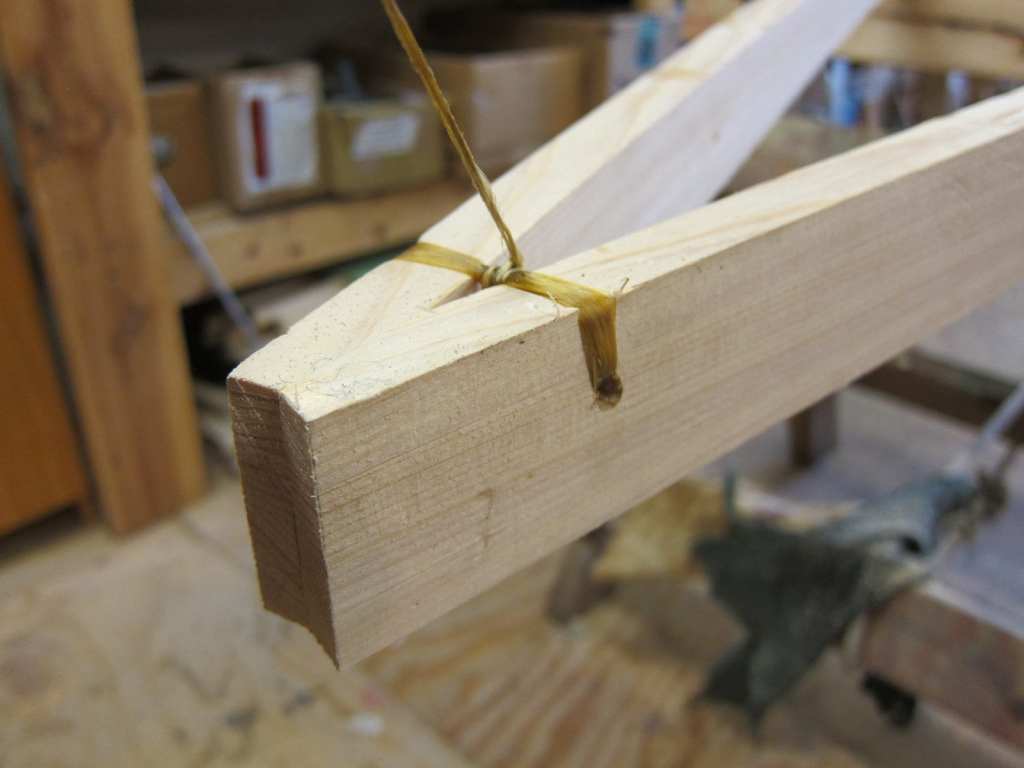
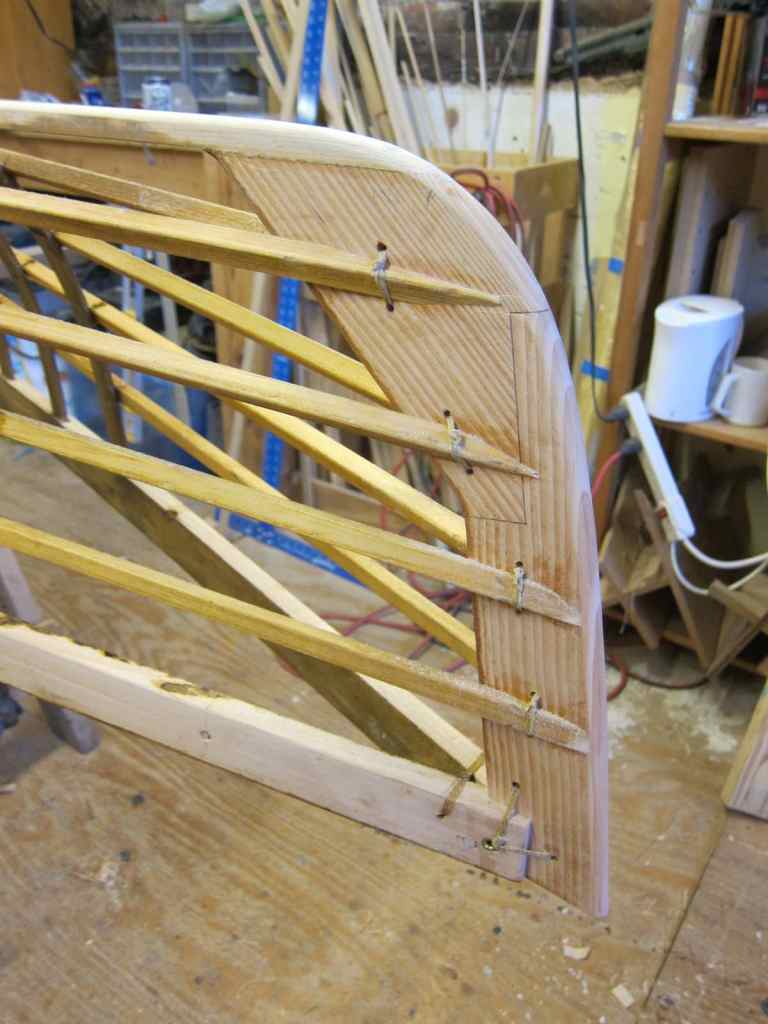
I added about a half inch of progressive rocker to the ends of the boat, and I used a laminated stem I had from a previous build to trace my shape onto the stem blanks. The shape was cut on the band saw and then cleaned up with a disk sander, and then a 45 degree chamfer was put on with a router. Finally the stem gets permanently lashed to the gunwales


Trimming and lashing the stringers
I used to find this part stressful and incredibly slow, but Brian’s technique of just going for it with some trust and then cleaning up mistakes by kerfing the cut changed that. Now it’s fun, and super fast. Now the boat is all one piece and can be flipped over, which feels great. Note that at some point in this process I lashed the keel to the ribs and glued and screwed it to the stems.

Obsessive boat weighing
Maybe it’s because people are obsessed enough with how much their boat weighs to yell “how much does your boat weigh?” across the water when I’m just paddling quietly along that I feel compelled to weigh my builds periodically throughout the process… but it is satisfying. Some day I’ll pick through all my notes and record this info in one place. Maybe.


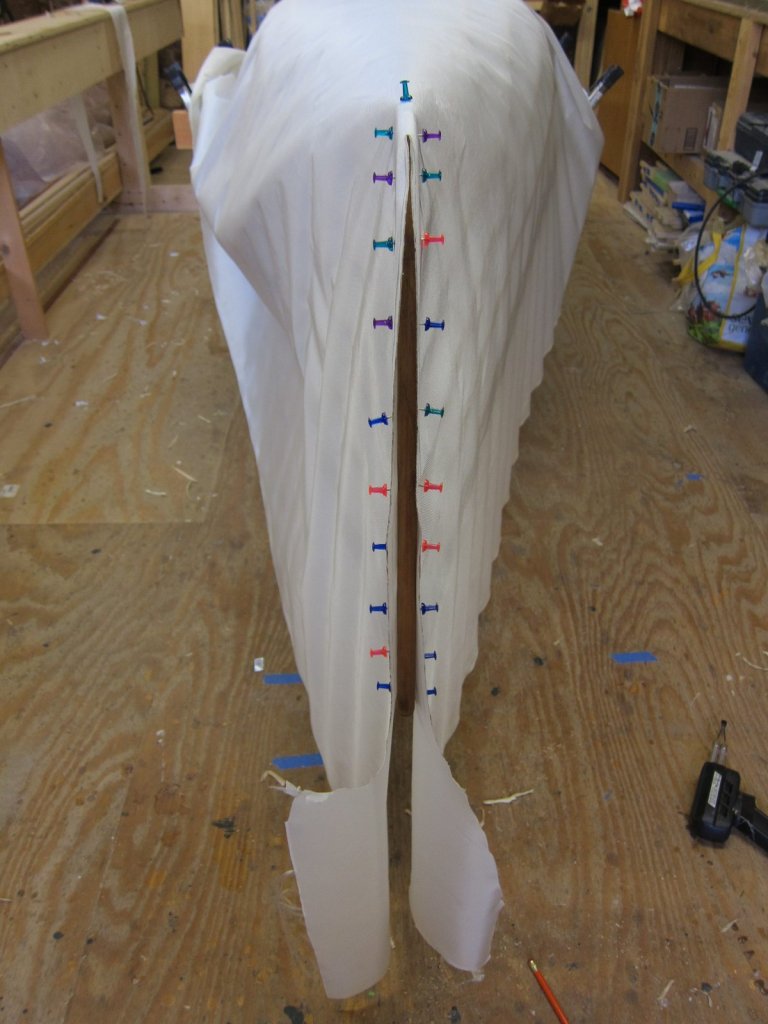
Skinning
A bit of a learning curve moving from polyester skin to nylon but I’m getting the hang of it. One problem I’m having is that once the wet and stapled skin starts to dry it likes to take the curve out of the middle ribs. These ribs are relatively flat-bottomed compared to the ones closer to the stems and therefore have less resistance to the pressure of the shrinking skin. Moving the sawhorses close to the center of the boat has worked well to fight this and preserve the keel rocker.


Coating the skin
I have now tried both of the techniques for coloring the skin: dyeing the fabric and mixing pigment directly into the two part urethane. The jury is out. Both work well – more even color with the dye, supposedly more resistance to fading with the pigment… the dye requires an extra step, but with the pigment you have to commit to knowing how much of the coating you are using on your build and mix the color in in advance… I could go on. On this build I used pigment. I’ll probably go back to the dye on the next one, just to stay fluent and keep experimenting.
As for quantity of urethane I believe that I did four coats total below waterline and two above. On the first coat I just went thick below the waterline and let myself run out after the third chine, then went back and did a much more even application to the whole boat on the next coat, and so on. I’m getting pretty comfortable with the process and am less methodical about planning my coats – just pay attention to how much material I’ve used and how much I have left, and focus on getting it pretty thick below the waterline where all the jabs, stabs, bumps and scrapes happen. I also use partially cured material generously to reinforce the skin over the lower stringers and the keel and stems. I’m super impressed with the nylon skin and two part urethane combo.


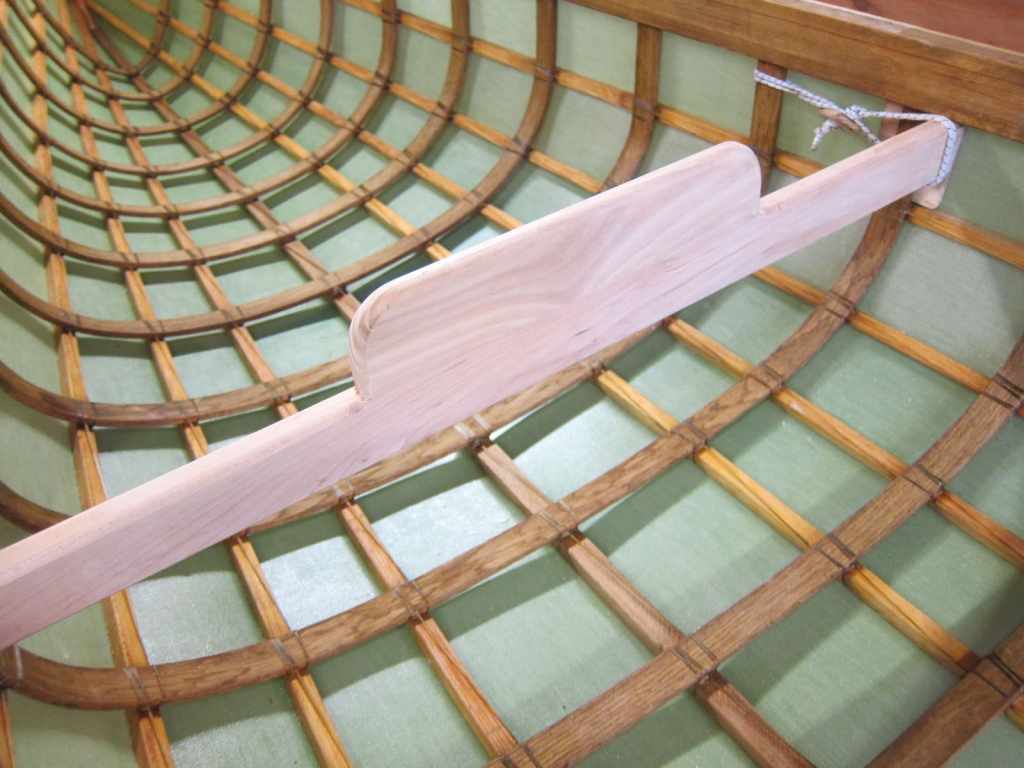
Thwarts
I came up with a variation on Brian’s removable thwarts. I like leaving the top of the gunwales as clean as possible, although I do plan to add bungees up there for paddle with a float for self rescue. I’m not 100% sold on my design but it works, and I love that the entire hull can be stripped of cross pieces… makes for excellent napping!
I also went for a carry loop that goes right through the gunwales, inside a plastic sleeve to prevent abrasion. I depend on the carry loop for tying the boat to the car, so I wanted this to be very secure.


Done
I did test paddle the boat, though I didn’t have someone there to take photos. That will have to come later. At 27.5″ wide by 13’7″ long, with a very shallow arched mid section and fine ends, I found the boat to be both stable and pretty fast. It’s also pretty dreamy to carry at about 23.5 pounds. The boat has quite a bit of rocker to it, but it still tracked well with a kayak paddle and even with a single blade canoe paddle, which is much more my thing. The rocker and relatively high end sheers makes the boat secure and manageable in the wavy waters of Lake Champlain. I was happy that the boat was stable enough to carefully heal on it’s side for paddling with a single blade while kneeling. If I paddle the boat more before selling it I will update my impressions.
Thanks for reading. Next build!…


January 4, 2020
Nice work, Matt, and interesting to read your account as I would like to build an open canoe in future, depending on how much storage space I have available. Happy New Year!
March 23, 2020
“depending on how much storage space I have available”
I have seen larger boats built in unusual spaces; see Deltaman and Peet (most understanding wife ever) on Woodsdesigns > buildersforum.
August 1, 2020
Nice looking work!! I’m closing on a home in Hartford, VT in 2 weeks, can’t wait to resume my clinker-built Ilur, a 4.4-meter dinghy sailboat.
This SOF construction caught my interest and I’ll likely begin work on the F1. Would be great fun here in the Green Mt. state.
December 20, 2020
Hey Matt,
Great looking boat! As a fellow Vermonter I’d be curious to know if you found a local lumber supplier?
Thanks,
Al