
Hi. My name is Dan. This fall I built an F1. After building my first SOF in high school to keep me occupied during a summer many moons ago, I am back in the saddle again. Only this time I can use nylon instead of canvas, sinew instead of screws, and 2 part poly instead of 3 gallons of house paint( and it still leaked)!
I selected the F1 because I fell in love. First with that photo when you open the website of inside the stern. Couldn’t get it out of my mind! I looked at other boats but it kept bringing me back. Then with the videos. Brian’s knowledge and easy approach gave me the confidence to tackle the job at hand.
Selecting the Wood

I was able to find red cedar in 16′ lengths and with some picking through the stacks found some clear straight grain stock. Feel lucky to be in an area that has a lot of good wood to choose from. Which came in handy since I needed to find wood as an alternative for oak. I have never liked the look of oak. For the coaming I used hard sugar maple and laminated it. For the ribs I found air-dried ash at a local sawmill. For the ash I paid $11 for a rough sawn 6/4 x 14″ x 8′. Figured for that price I could break a lot of ribs!
Laminating the Coaming and Deck Beams
I followed the shape in the plans at 33″ and made a plywood jig and cut 5/32″ thick strips of maple on my table saw. Then I prebended them with a heat gun, cut them to length, and glued them one by one. Sandwiched in a cedar strip to give it some interest. I used all the clamps I had and also ones made from 2″ PVC cut to 1-2″ widths.


Cutting Mortises
Though I have plunge router I had never really used it. I found following Brian’s method for the rib mortices easy to do. For the deck mortices I purchased Brian’s predrilled block. I found after the first few drills that it reamed it out. So I found 1/2″ ID washer extenders and inserted it in the block and that worked.


The other small jig was to drill the holes in the coaming.
The Deck
It was nice not to have to use a strongback! And cutting the tenons was easy with the video instruction.

Ribs
To get the shape for each rib I first cut and bent Romex.


I cut the ash ribs to 9/32″. The wood had been air-dried for over a year so it took 15-16 minutes to be able to bend. I was not able to bend the first rib so I laminated it. As I went I would pull out the romex and add the wood rib.


Getting that look!
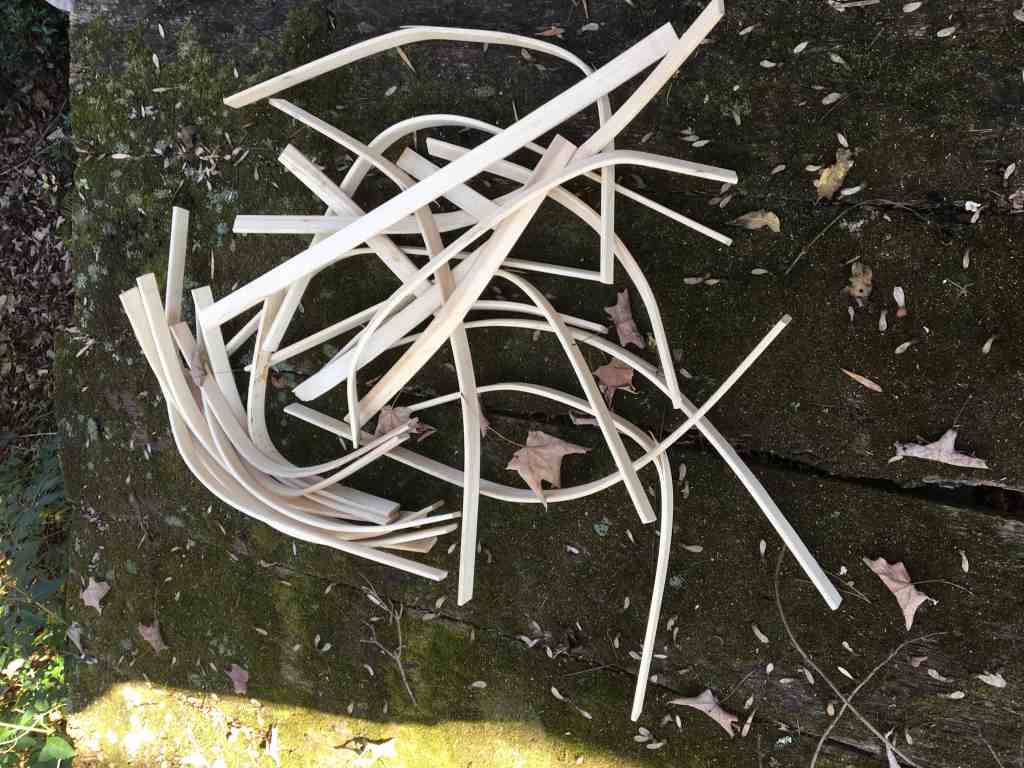
Rib graveyard!
Keel and Stringers

Needed a few shims in the middle. Used fabric tape measure and the eyeball to center.


Oiling the Frame- Ready to Skin


I added the slats since I wanted more support entering and exiting the kayak.
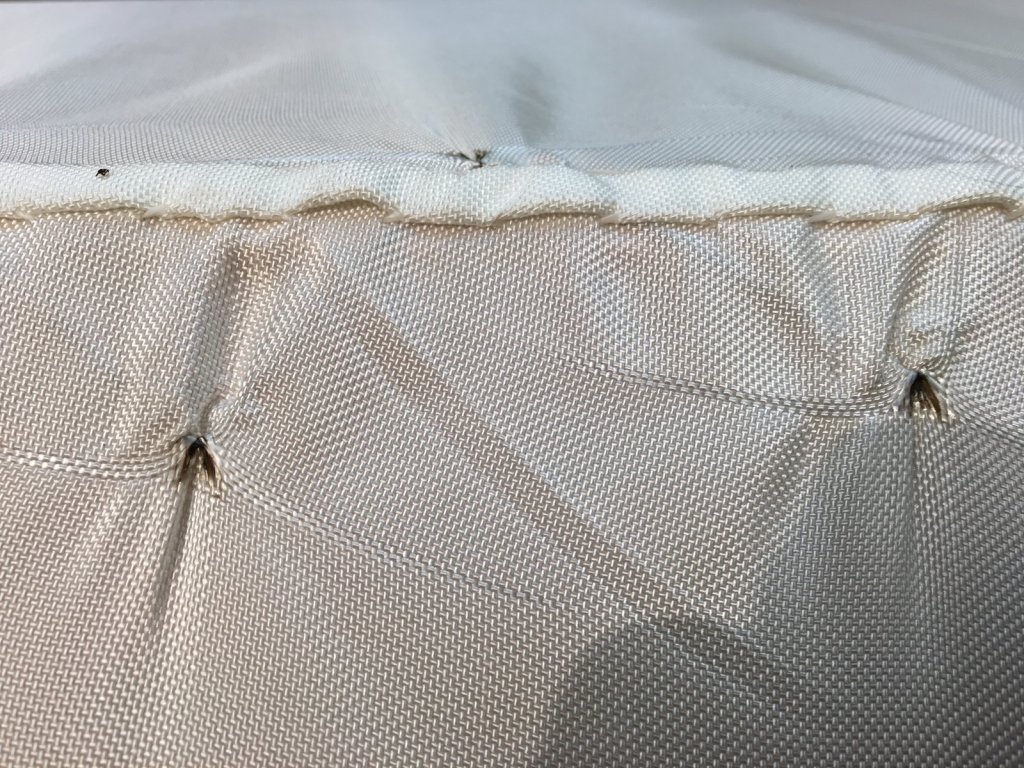
Sewing the Skin
After trying stitching with artificial sinew I settled with Dentotape and doubled it. Looked cleaner and redoing a section did not leave brown stains. I also esthetically did not like the robey look so went with a flat stitch after using the black cord to tighten it first. That also made it easier to run my rub strips up the stems.
I had the room temp at 45-55 degrees and used Corey Freedman’s 9 oz nylon at skinboats.com.
To trim the fabric I used a woodburning iron with a fine tip. It was hot enough to leave a clean edge and was almost as fast as the one Brian was using.
When I sewed on the coaming I folded and clamped the whole thing before I sewed it.


Shrinking the skin
Since it was winter housing the kayak down would not work, so I got a gallon sprayer. I started on the bottom and did get a fem water streaks there but not on the top. It was amazing to see the wrinkles disappear as I ironed them!


Urethane Application
So I put on some great painting music. Heated up the room. And enjoyed the final big step….until I ran out of part A on the final coat! I’m an accurate measurer and I was a whole ounce off! So between what I could mix and what I had left over from the bottom, I coaxed and squeegied on enough to cover 90% of the front and 50% of the back. Since I did not dye the boat it did not look too bad. What I didn’t realize is that you won’t get a good chemical bond after it sets. So lesson learned…..get the extra part A!!


The Finished Product
I made the toggles out of hard maple and the extra rub strips out off ash.
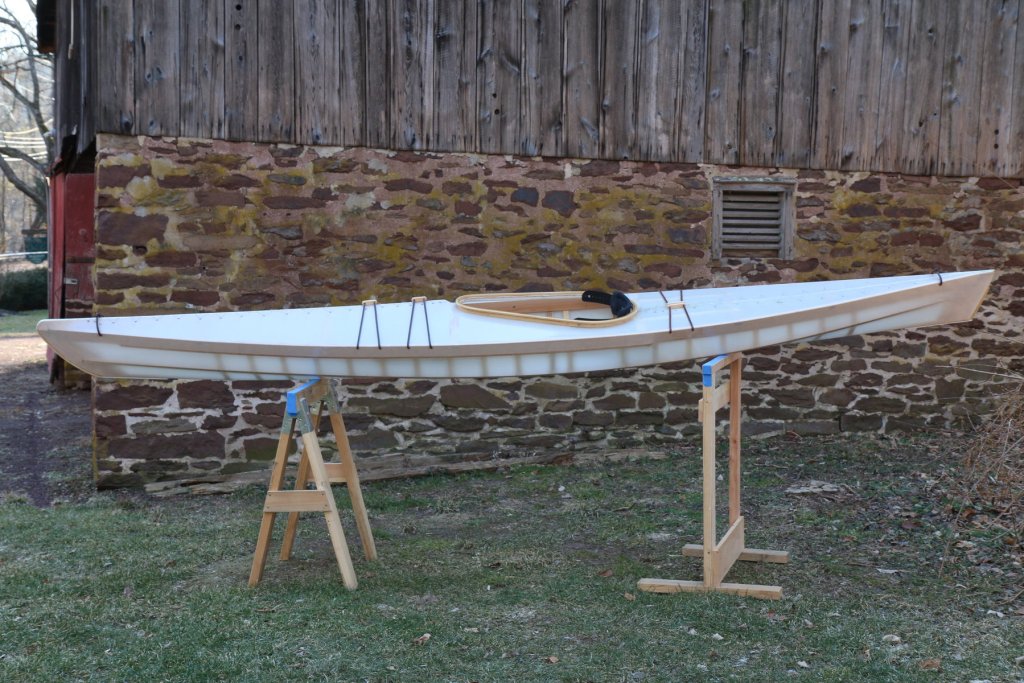


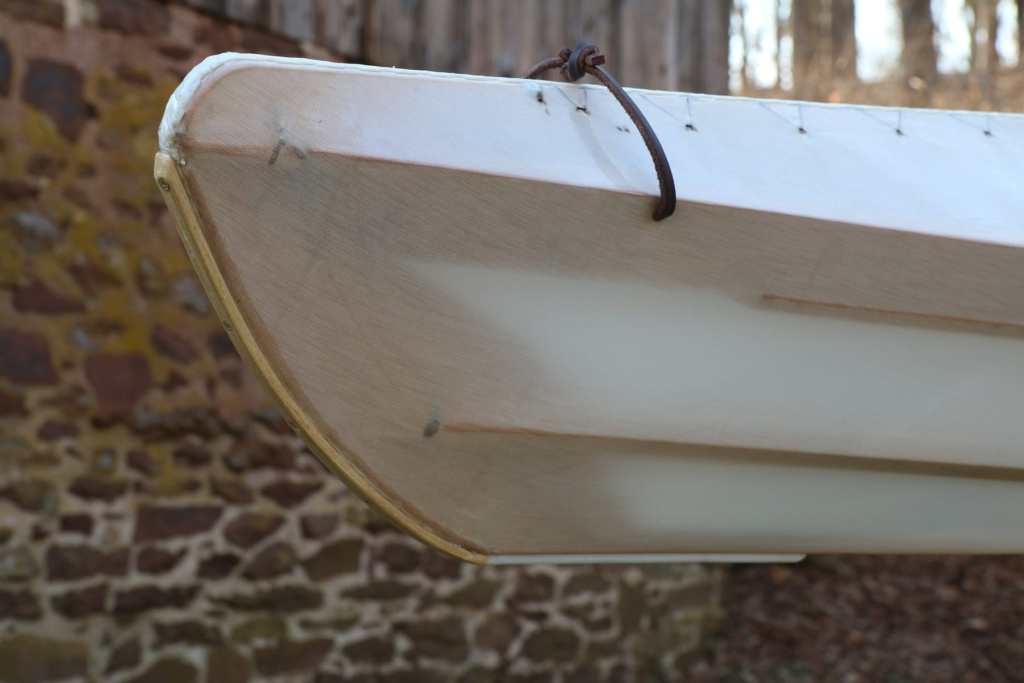


Got that look!
Maiden Voyage
I couldn’t wait. So in February I found an area on the lake that was not frozen. It wasn’t very big but I was able to get a first impression. Piece of cake to load. Very comfortable. After breaking through some thin ice I was impressed at how quickly I was able to get to cruising speed. My other kayak is a cedar strip 16’8″ Endeavor and the F1 is much quicker and just as fast. Tracking was good and small corrections brought it back on course quickly. Stability was not an issue. Can’t wait to get out and really give it a test run! It was as much fun to paddle, as it was to build!


June 9, 2018
very inovativ to test-mount the ribs with a different material.
September 9, 2018
Beautiful boat! I am in the very early stages of construction on a F1 for myself. Looking through the other builds is a valuable resource. Brian’s plan and video series is a cool way for him to transmit the information!
April 9, 2022
Dan,
Nice job. I am just finishing up a pair of Pack canoes and I was looking at the PA boat launch permit website; I hate the idea of sticking one of those decals on my boats, not sure how they will peel off the skin when it’s time to be changed. I was thinking of getting some kind of tag holder, do you have any suggestions or insight to share?