
Green oak and Cedar!
Last year I built three SOF kayaks, all fuselage frame construction.
Two Gentry KidYaks, and a 1931 Disko Bay, for which I took the museum lines plan and lofted it full size. The kayaks have all worked well, but I want to build a proper steam bent framed one! I want this one to be as light as possible, around 15kg.
4th December 2018

The local timber yard builds fence posts and other stuff. This generates a lot of oak offcuts, all fresh. I collected a few pieces for the coaming and timbers.
21st November

The other timber yard is more modern, and they have a good pile of Western Red Cedar. I think I bought too much!
Building this kayak will be done at the end of the day, on the way out of the workshop. Not the best way, but free time is limited!
Last week I made a coaming jig, and this evening I steamed a few coamings. I then came home and watched Brians videos, on coamings.

Now I have watched the (excellent!) videos I can go and do it again, but better!
As you can see I put the scarph in the wrong place! Sorry Brian!

This evening a change of timber to a different piece, and following Brians instructions exactly yeilded a good coaming and a good lip.
Within the ones in the picture there is one good lip and one good coaming.
Machining the Cedar


Laminating deck beam
Laminated three cedar deck beams this afternoon.
Back on the case a few weeks later…

I had hoped to achieve great progress over the Christmas Holiday, but van maintenence got in the way, along with Christmas itself!
This afternoon I fastened the lip to the coaming. Leaving it this long meant the oak had really hardened up, and took some persuading to bring the two halves together. Plenty of cramps and some glue and it looks presentable enough.

Later the gunwales were sanded, paired up and mortises for the frames and beams marked out. I also made the two formers. This time I could refer to Brians video, run downstairs, do the next section, then return upstairs for the next bit!
Hopefully tomorrow evening I can cut the mortises.
15th January 2019
Well another week or so has past!
I shall name this kayak ‘stolen moments ‘!
Yesterday evening I cut the mortises for the frames. We are lucky enough to have a mortice machine in the workshop, and I think this is the first time it’s been used! Once set up it munched effortlessly through the cedar. Doing the angled mortices for the aft deck beams was a little tricky. In retrospect I should have just made the jig and not used the morticer.

Next evening, finally put the gunwales together and put the forms in! It’s starting to look like a kayak at last. Kerfed the ends and did the lashings with artificial sinew. This stuff is so flat, and much better than the round stuff I used on my previous kayaks.


The hole for the lashing was 6mm lower than suggested by Brian, but there was a screw hole there from when the two gunwales were together as a matched pair.
Brrrrrr! 4 deg in here.
This evening I finally had enough of imperial measurements !! I’m OK with feet and inches, halves, quarters, and even eighths. However sixteenths just fry my head, and I am frantically converting everything to metric. So my Special Stick is 7.93mm!
Anyway , engaged brain and fitted the forward three deck beams, then went home.

A small celebration this eve as the last three deck beams popped into place. The two behind the cockpit were both spruce because I had a section of an old bowsprit which needed using up.
I had one little issue yesterday, and that was when the forward deck beams were in, the forward form was 6mm slack. Went home and emailed Brian who replied that morning with possible causes. Thanks for the rapid support Brian 👍. A slight massage of one shoulder on the beam and she is on the marks!
Off to buy some dowel tomorrow so I can peg the ends etc

.
Assembled the gunwales for the last time. I still hadn’t bought any dowel to peg them, and rather than drive the forty minute round trip to buy some, I made up my own. I’m not really keen on shop bought dowel, I don’t know what wood it is, and it seems a little soft to me. For the larger dowels I used oak, which you simply hammer through a piece of steel plate. Drill the hole for the finished size, and leave the burrs on. It actually very quick, and quite satisfying !


The smaller holes are for smaller dowels…
Drilling off the holes for the deck beam dowels seemed a little drastic, but once in the structure is really stiff and strong.


Machined the timbers this evening.

So yesterday evening saw the frames cut to length and set up ready to go. I already had a steamer, so quickly made the steam box to Brians dimensions .
Whilst waiting for a Head of steam I downloaded an Interval timer App, and then we were off.

It went reasonably well, but with about eight breakages . On reflection I should have made a diagonal cut through the board of oak to get the grain straight. The waste would have been the same, but the bending would have been more consistent .
I set up to replace the broken ones with new, and steamed those in. It was well into the night by now and the workshop was just two degrees , so the timbers cooled quickly . Overall it looked okay, but the sat and watched Brians video again, concluding the aft frames were too low. I realised I had not marked the frame lengths correctly, using the aft face, not the widest face nearest the cockpit. Whoops.
This evening I quickly machined some fresh timber, and they went in very easily. I cut these frames from another piece of timber which had better grain and they went in easily.
I set up a scrap of timber to set the aft keel height to check each one as it went in. The previous ones were quite square, but these were more rounded.

Steam Box

Rejected aft frames.

View from forward.
Nearly a week has gone by, and the Kayak frame has been moved around a bit. The next job was to peg the frames , but I wanted to check that the frames were reasonably fair before doing so, so this evening I clamped the keel and stringers on and took a good look. by taking off a few mm from some of the frame ends hopefully I will only need one shim. The keel doesn’t seem to have much rocker though , so tomorrow I will put a string line down it and have another look. I also glued up the cedar to make the stem and stern posts.

It got very cold and was time to go home. The stem and stern post measurements are correct though!
The dog is giving me that ‘lets go’ look!

30th January .
Finally felt I was making progress this evening.
Don’t tell Brian but I used the gripfast bronze ring nails to fasten the frames into the mortises, after nipping off a couple of millimetres .
Fitted the stem and stern posts, getting carried away by making a simple joint complicated. One part is now pointed to fit up between the gunwales. Lines the stem up nicely !
Sanded and radiused the keel, put it in position, checked centers, wound a bobbin of polyester thread and got lashing! Doing one extra turn on the square lashings resulted in just running out before the end frame, but a separate lashing won’t hurt.

Pleased with the keel line and rocker too!
Despite getting late , and supper calling, I quickly re-watched the videos on marking out the stem and stern post. For these quick reruns I watch the videos at 1.5 speed.
Due to a crush in the timber I had to shift the keel forward . When it came to marking the stern post the keel was just long enough, and didn’t need cutting to length at the stern.

The keel is slightly narrower then the stem and stern posts, probably due to me not getting to grips with those pesky imperial measurements!
It’s finally looking like a kayak! 😀
January 31st
Lashed the stem and stern post this eve. Really enjoyed this bit, and amazed how tight it locks the two parts together.
Even without the stringers the hull is surprisingly stiff and sooooooo light!


Saturday 2nd February.
Fairly determined to make major progress today , so as the stringers were still over length, marked them out and cut them to length. Put them on the Kayak and found they were 4″ too short . Checked again, and they were still to short. Googled what time it was in Oregon and realised that an email from me to Brian at 06:30 in the morning, on a Saturday, asking why I had cut my stringers too short was really a silly question , and one that even Brian could not answer !
I had made a scarphing jig for just this sort of size timber and within five mins the scarph were cut and the cramps were on, with the five minute polyurethane drying .
Whilst the glue was drying did a little sanding, glued the little infills on the stem, and double checked the video on stringers, again.
Set the stringers up, checked for fairness and symmetry again and again . Clamping the stringers on did throw the keel a few mm out of line in one place, but I was able to massage it back through the lashings .
Really enjoyed the lashing process. My polyester looks a little thin so I double wrapped and double flapped each frame. That takes three and a half kayak lengths of polyester .
Aft stringers fell into place, as did the bow.
To be honest , very pleased. Looks fantastic !


Sunday.
Had to pop down the workshop . Beautiful sunny day so took the opportunity to take some pictures, but no other progress made.


6th Feb.
Set the Kayak up on a string back as I wanted to see if the rocker was the same as the lines plan. Scaled up from the drawing , and two foot back from the bow it should be 2 1/4″. Happy to say it’s spot on!

During the final sand, (not turning it into a musical instrument ) I decided I didn’t have the shape of the bow right. It was a little full, or more Percy Blandford (post War UK kayak designer ) than Cape Falcon Kayak. I took a fairing batten to it then planed away a good 12.5mm. I also faired in the stem and stern posts, reducing the 11/16 to 3/8 (10mm).
After a final final final sand, I drilled a few drainage holes through the secondary stringer, hoping these might provide a little ventilation too.
Out with the Danish oil, I realised I didn’t have much left, however I did have some Australian finishing oil, to which I added a slug of Tung oil, then some terrabine driers .
Spent a happy hour soaking the framework , which now looks good enough to eat !


Sunday 9th February .
Again great plans, but a few distractions saw a late start . I decided to bring the frame home to skin it , and after fitting the foot rests and collecting the gear it was three o’clock by the time the Kayak had been posted through the window and sat on trestles half way between the kitchen and sitting room.


Fitted the skin. The back half went well, as I was listening to the radio . The front half wasn’t so neat as the TV was a distraction. Looks OK though. Finished about midnight.
The following evening I fitted the coaming , and she is looking good!


Tuesday 12th.
Coated the deck with a Urethane coating . It was tough going as it was only ten degrees in the shed, and the resin was very thick.
I was rolling it on, but quickly reverted to a squeege to spread the stuff out. As a boatbuilder and finisher I dread this bit, as getting a half decent finish is not easy.
Later in the evening I turned the Kayak and rested it on its coaming. By this time I had delved into the data sheets and found I could thin the Urethane by up to 25%!

The hull coatings went on well, but as usual I wished I had done it in the day, rather than late at night. Ultimately tiredness got the better of me and I had to go! A few runs, but not too bad . Looks OK from a few feet !


Weds 13th.
So this morning I cleaned up the mess and ran a bit more Urethane under the coaming to seal up the stitching holes.
I am not a fan of the shiney finish. I don’t like a shiney foredeck because of the reflection of the sun, but also a matt finish to me looks cool, but also covers a multitude of sins . So I gave the deck a coat of polyurethane satin varnish , and it looks much better.
Weds 23rd February.
Well the satin varnish never dried. Today I took to it with white spirit and removed it, and I am back to a rubbery shiney kayak .
Thursday 24th February .
LAUNCH DAY
The sun came out, it was tea break, and the tide was up, so decided to launch her for the first time. I just had five minutes in the marina , with the dog on board, no spray deck and no deck lines .
First thought is wow, this is comfortable !
Not at all tippy, accelerates effortlessly , turns well and so far all good !

Note the drops of seawater !!

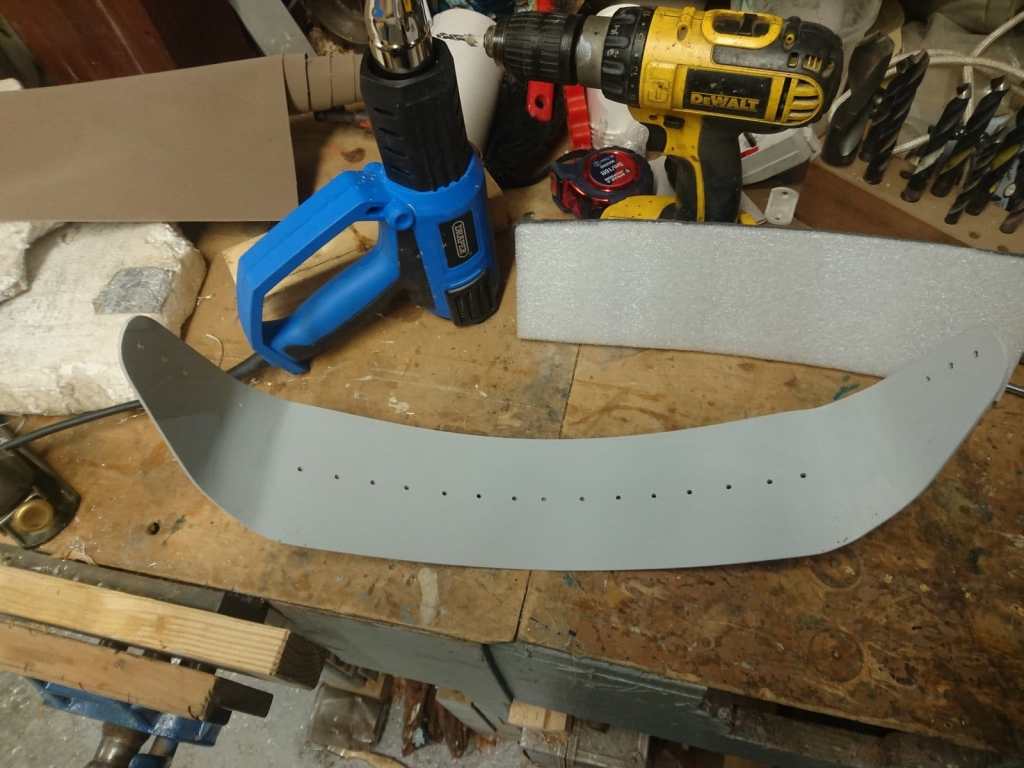
I still needed a back band, and not wanting have one posted half way around the world I used a piece of Jemiclad. This is pvc made to clad kitchen and toilet walls. It heat forms very easily . My offcuts came from a skip, left over from building work.
Some closed cell foam, a piece of acrylic cloth, and lots of holes produced a reasonably un-offensive back band.


Fitted the back band a few days later. I used stainless steel ‘inter screws’, as these give a very flush finish. We use them on fastening perspex windows on yachts.

So a few days later we had some good weather so headed of the the Isle of White for a couple of days. The F1 stowes neatly on the side deck.

Once there, I could finally have a play around, although in very flat water!

The dog was very insistent on joining me and soon took up his usual place…

I have since been out a few more times, and in some wind too.
So what’s is like?
Well, it’s comfortable! Room to wiggle , paddle legs up or down, knees up or down.
The mat seat keeps your legs warm too.
It edges beautifully, tracks well, but is so maneuverable compared to my West Greenland kayak. At 13.5 kg getting it onto the roof of my van is a doddle too. I have yet to surf or roll it, but will do asap.
Sliding the buoyancy or kit bags inside is easier than my fusalage frame construction Disko Bay. That inch of framing is a real hindrance.
As an alternative to leather straps I used Artificial Bridle strap. This is 250kg webbing , covered in tan vinyl . I split it down the middle and it looks and performs like artificial leather!!
So I suppose that is the end if my build blog!
I have enough timber for a couple more. My son wants a 100lb version so that’s on the to do list, but he still fits into his SOF Kidyak .
As a boatbuilder, we have a ton of spring work ahead of us for our regular customers , so no more part time projects for a few months!
A few thoughts. ..
When watching Brians videos, take notes, otherwise you have to watch the video again and again , and this takes time.
Follow his advice ! Everything is done for a reason. If you can’t figure it out now, you will later!
Put the cut lists you are not using in the back of the file, or you may end up with a kayak longer in shorter than you planned!!
Don’t hurry, enjoy the process, because when it’s finished you will want to build another.
Whilst it’s possible to fit the build into the odd hour here and there this has to be the most inefficient way to do it! Give me a clear week with no interruptions and I could another, rather than over a couple of months.
I keep this kayak in the workshop, right next to the water. If anyone wants to try it before building one you are welcome to try this one. I would be happy to build another for anyone as well, with Brians permission/licence fee etc.
Nick Gates.

Having real trouble catching any seals, so I have employed some war time dazzle camouflage . I know ‘nothing sticks to urethane ‘, but I painted ‘F1’on the back a month ago, and it stayed on.

Update! September 2019.
The F1 has been out and about about about twice a week. Quite a few people have tried it, an loved it!
On a recent paddle we found our children had grown out of their Kidyaks, and my Daughter was in a lot of pain after a couple of miles, being wedged in to hers.
Anyway, she snuggled down in front of me in the F1 and we had a lovely paddle home!

Two up in an F1!


June 8, 2020
Hi Nick
I’m thinking of building an F1 and just getting ideas together. My mother lives on Hayling island so i pass Emsworth area a few times a year and i was wondering if i could buy you a beer, or a coffee (when its safe to do so of course).
cheers
Simon
June 10, 2020
Hi Simon,
Yes, you would be most welcome. Best thing to do would be to take my F1 for a paddle.
yours,
Nick
June 10, 2020
Nick,
oh gosh thats so kind of you , yes definitely,
shall i contact you when the world is a bit more settled ?
I’m not sure how things will pan out. We may yet get a second wave, i’ve been isolating myself, due to firstly i live alone (my girlfriend has children so we have stayed separate) and secondly my mother is 85 so i didn’t want to take chances.
nice to be in touch
Simon
Simon.bessford@gmail.com
August 30, 2020
Nick, thanks so much for posting your build. Where do I get best priced Western Red Cedar and Oak? We have standard building wood suppliers around us but no idea if that is best ie. Champion timber/ Alloway/Alsford. Thinking of F1 build and if that works out nested canoes for the family, but want to start with budgeting to make sure I commit to something I can complete. I’m based near Woking but we go Hayling island to swim/sup.
Simon – where are u based?
May 28, 2021
Hi – Thank you for blogging the build – very nice pictures and a great looking boat ! Since I am a father with 3 kids ( 10 /8 / 5 years .. ) would you recommend these Kidyaks ? They look really nice..up to what age are they usable ? And what about the plans ? Since I am used to Brian’s instructions, I have high expectations ;). Or maybe @ Brian : why don’t you design a nice little kids boat 😉
May 28, 2021
Hiya, build a couple of Kidyaks for the younger two, and a scaled down F1 for the eldest.
The Kidyaks are great. V quick to build, very fast, and our kids loved them. Smallest one now grown out of, but that is what happens! Everyone we have lent it too has loved it.