

Welcome to Lysekil for a moment!
I moved over here a couple of years ago and have a coastal landscape to discover. Have a small workshop and can’t stear a real boat…looks like a kayak is a good option😉


Ironicly my house is situated in an forest of oak and I got three trees with a very long clear section on my property. They look realy great where they stand and it would be a shame to cut them down.


For starters!
Ok, let’s start building here. I decided to build an F1 stubby version in the 150 lbs size. I would be very interested in making the ultralight version but I settle down on seeing how the regular hold up first. Maybe later i go UL.
The oak that I got is Quercus robur, also called Common oak or European oak. A quick look att Wikipedia says its a species of white oak. None of the boards that I looked on att the mill had a 8 feet clear section. Finding that long piece for the coaming would require some snooping around and I wanted to start my build pretty soon. Getting the kit from Brian was great option and made it soo mutch easier.

Sixten had a blast with the bubblewrap and latigo!

Cutting up some oak
Cedar arrived pretty quickly. I’m begining too know the guy from DHL, that’s always a good thing. Never worked with Cedar before. First impression, it realy have a feather weight feel, looks nice and have very special sweet smell to it…this will be more fun than expected.

The red cedar was out on stock for all of the long material. Wanted a bit of easy street here. But o well, lets try some scarfing then. I had to fiddle around quite a bit to make the cut on my contractor grade table saw to go strait. Put a scarfed stick to a torture test by trying to break it. The scarfing proved plenty strong. The glue was easely stronger than the wood itself.

A kitchen experiment! My wood was very green and I could very simply bend it to that tight radius we want. My ribs was cut from two inch material on wich I cut away the sides. The piece that was left was very wet. Felt like overcooked spagetti even before it was steamed.
After a day of ripping and planing my workshop looked somewhat like Pompeii AD 79. No pic of the historical mess but it was of biblical proportions. Note to self: a dust collection system would be a good thing.
I took some time of to go paddling in between:


As a woodworker I find myself working more and more with handtools. I usually do all the dimensioning on machines and then switch over to the handtools. I just like it that way. Anyway I decided to cut the mortices with a chisel the traditional way. Wanted to try it out on a large scale and learn some skill. I know it sounds just like the beginning of death by Tendonitis(a very horrifying syndrome😉 but there is a realy neat trick to it.
If you havent seen this, watch Peter Sellers cut a mortice behind a plate of glass on Youtube. Skipp ahead to 6 min if you are in ha hurry:

I made a simple jig witch I clamped the gunwale. It centered my mortice and helped me keep the chisel strait. I put tape on the chisel for depth. I also used a test stick with the correct depth to get it right. The correct depth is very important, othervice ribshape will be incorrect. The time spent was four hours for the rib mortices. That includes making the jig. I also got them to the correct size to the ribs. No need to adjust the ribs later. This came as a nice surprice because the ribs are slightly thicker than my chisel. I used a 1/4 inch chisel and I guess it scrapes away the soft cedar sides of the mortice.
I use a leather strop permanently clamped to my workbench to keep the chisel realy sharp. It’s just a piece of leather glued to a flat board. For honing compound I use a product callet Autosol metallpolish, witch I smear on and let dry. It does an excellent and cheap job of getting the tools razor sharp. Usualy I don’t use the sharpening stone very often. I just use the strop over and over. For sharpening stone I use a Atoma 1200 grit diamond. Tried others like Trend and Shapton but I like Atoma more.
Is using a chisel a alternativ to using a router? Onestly, no! Router is simpler and gives a very nice finish and exact depth. Cutting mortices in softwood is also more difficult because the wood easely get dings and chipouts. Great care needs to be taken if good finish is expected (wich I didn’t) . For someone who is on a tight budget it’s ok. What ever method you use, to make some practice cuts on a scrap piece, is a good advice.
The time consuming part with the morticing is chip ejection, not so much chopping. The mortice is pretty smal and chips get jammed down there. That dual chip ejection Brian was talking about would have been nice.
Chopchopchop
Chopelychop
And suddenly there is a couple of square holes.
Then of to bed and up for work…
Assemblytime!

But first out, breakfast!

…Can’t have too many springclamps
Building the deck with Brians method for mortice and tenon was simple and fast. I couldn’t find my correct sice chisel so I used the drill jig method. I liked the method to use the special sticks, that part was a new one to me. I had to fiddle around a little bit with the lengh of the deckbeams, when fitting them. They where pushing the Gunwales out.


Without banana stupidity is close!
Steaming part was easy. I had excelent rib stock. Used two minutes intervalls and six minutes in the box. That gave me plenty of time to fuzz around with symmetry. If you want to adjust the ribs inwards, a screwclamp over the mortice can be a good idea to prevent them from cracking.


Lashing the keel and stringers was the best part so far. Must be something about watching everthing come together and stiffen upp. I realy liked those creaking noises the wood gave when coming under tension.


Shaped the stems with handsaw, chisel and spokeshave. The soft cedar shapes beautifuly with razorsharp tools. It’s realy fun work!

Had some ash lying around in workshop for the aft stringers. Hardwood can be mutch easier to shape if one goes crossgrain. I chamfered the back edge slightly before doing this, to prevent blowout.

Starting to take shape. Very happy about it.

Trying to avoid a mess with the glue. Not 100 % successful on that one😉 but I don’t care, it won’t be visual.

Me: Elsa, you are late for work! Where have you been?
Elsa-Pälsa: Well eerh just nappin. Lookin for snacks…seen mice?
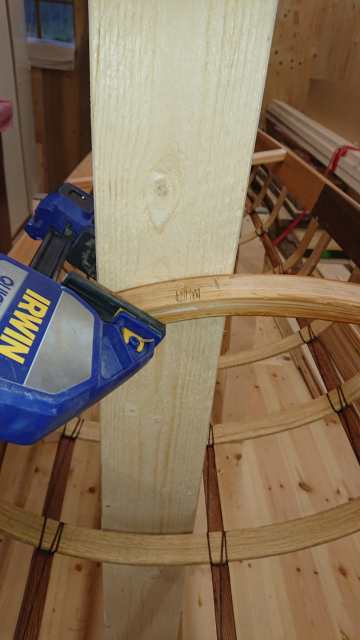
Have this Irwin quick-grip xp (extra power). Use them all the time, they are da shit!


Mounted the deckstringer, footbraces and finished the frame. I oiled the keel and stringers after milling them. The rest of the frame I only oiled the inside. Just lazy, no reason. Rot won’t be an issue on this one and I will store it indoors. Wood kan get discoloured if left bare, hence doing the inside.


Not completly finished but the sun was out.


My nylon is a bit late to arrive so in the meantime I carved a paddle. Reasons for edgejointing the paddle blank:
1 I have a 30 inch jointer.
2. It smells nice.
It gave me perfect oppertunities to nerding it all out in handtools. Handplanes, drawknife and spokeshave. I was knee deep in curls and shavings….what happiness!
Getting the thing suited up!
It took a couple of weeks before I had the nylon and I could start with the rest. I was very psyked up to get it done. The thing that I had the least experience with was the sewing part. I’ve always felt awkvard when sewing. I got the 310 g nylon from Extremtextil and I ordered it a bit longer so I could make a testframe before comiting.

Hey! Give me a break, this was my first time🤭

I soon noticed that the nylon from Extremtextil has a pretty loose weave, too loose in my opinion. It made it difficult to get the proper tension. When tensioning the skin, the black thread would just tear throu, leaving a very large hole. I tried not to overtension but I found the testframe not as tight that I wanted (after this Brian uppdated his instructions on the nylon that I used) .
When in trouble it helps to take a break and think it trough for a wile. I considered ordering another skin but it would take weeks. In the end my eagernes for go paddling won over my patience. I decided to strengthen every place where the black thread was going throu with a couple of stiches. It turned out to be a time consuming job but in the end it got me the finish that I wanted. This took me at least 4 extra hours

Sewing up the stern and bow was easy. I found these mini springclamps helpful for my fumbly hands.

Tensioning the skin. Here one can se my extra stitches. Don’t forget banana!!

After a very long day I managed to get the skin on without looking too Frankensteinish i think.

Sewing the coaming was easypeasy. I used a couple of thin pliers to realy pull the skin up, it made the sides of the coaming drum tight.

Colouring the skin was easy and straightforward. I used three teaspoons of ochre and one russet to get that orange colour. I chose it because I think it would look perfect on pictures.
For you non English speaking builders, watch out with the translation of the product “white vinegar” (“ättikssprit” in Swedish).

For coating I used three cans of 750 ml Coelan. I cleaned the workshop twice very carefully to avoid dust and other crap getting in the varnish. I covered the skin three times and put some extra on the bottom between the stringers, and also all along the seams and holes.I had some trouble with particles from the foam roller coming of and into the varnish. When dried I could carefully cut these of with a supersharp chisel. Later on I read a tip to rub the rollers in your gloves a bit and to exchange the rollers after a while (this would consume more goup).
The Coelan was easy to use but It had a disgustingly nasty smell that stuck everywhere. I used both respatory and protective clothing (expect to do the rest of the build with the respatory protection on, if using this).
After doing this I found a product called “De Jissel doubble coat doubble UV”. It comes with detailed instructions, tips and Youtube clips to make it clear. If anyone have experience in using this, please leave comment.

The close in structured golden look of the skin is awsome! I strengthened the attachment for the seine twine with a couple of 8-10 stiches at each point. And yes, that took like forever.

At this stage I couldn’t wait. I had to go for a spin…first little trip was magic!
After three strokes with the paddle I realized that this Kayak is at totaly different sport than anything I’ve ever tried earlier. It is so nimble and easely driven. Stability is mutch better than I could imagine. The Greenlandpaddle also worked out realy well, it is so pleasant to use.

Gone paddling all summer….


I’ve been out paddling all summer and I have had such a blast with the F1. The best part so far is trying to surf and holy crap, that is fun!! Right now I’m learning to roll and rescue with it. There is so much fun adventure to discover.
So, what about the F1? What I value the most is the nimbleness and the low weight. The secondery stabilety gives me extra confidence and it feels at home in wind and waves. In short, it’s a very fun and seaworthy kayak to paddle and it have made appriciate paddling even more.
It took me eight days building it. Maybe I could have done it faster but it realy wouldn’t matter if it was ten days. I took careful attention to Brians advice and followed them closely. I watched all clips at least twice and took notes on the side. The courses are realy comprehensive in detail and are easypeasy to follow.
I’ve never missed that high top speed while paddling the F1 with friends. If I wanted more top speed, I would get more like a surfski kind of thing. The packing space needs a bit of planning and streamlining to be able to bring all those goodies you wanna bring on a trip. But then, if I would have built me a barge, I don’t think I would paddle all that much. I will gladly build another F1 for my friends to paddle. Next one gonna be a ultralight version.
Choosing a kayak from top speed, packing volume and primary stabilety is to me irrelevant. Choose one that is fun to paddle and it will make you go out and paddle I say. When I started out I still felt like a beginner and I felt a bit nervous to get out on the sea. I’m realy happy with how the kayak came out and how it paddles.


November 27, 2022
Nice 🙂