

My first ever blog… for canoe’s! Who’s have though. I’ve been stewing over building a floating contraption of some type for some time. I really wanted to do a cedar strip canoe but honestly know basically zero about what I actually want and felt that 200+ hours was a lot of time for doing this. As a teen I did a couple of week-long type canoe trips with my brother in Algonquin, Ontario that got me hooked. I did some teen-aged white water canoeing as a kid… managed to wreck a friend’s dad’s 17 foot kevlar boat not at all designed for the purpose in the process. I’ve been making furniture for years now getting more and more adventurous in that regard trying my best to do primarily hand tool work, some steam bending, you name it and felt like it was time for something new. Poking around I found Cape Falcon and immediately these beautiful boat and Brian’s calm method of explaining his craft gave me confidence this was the path forward. First: paddles. 4 of them. One for me and one for the missus… butternut with some walnut accents. Two for the kids: butternut with some various scraps of walnut, maple, ash. So far working out okay.

Okay…
I’m blogging as one should not but here are a few pics and thoughts of my process building a nesting pair of boats 15’6″ long for the larger (larger solo for me, 185 lb man, 140 lb woman). We have two kids ages 8 and 5 almost who will mostly be going along for the ride. The nesting will help us transport with our subaru. The goal is local/evening paddles, some camping, some day trips on our local lakes and rivers.
I bought the wood, 16′ clear cedar, for the gunwales, stringers and keel locally… not cheap given pandemic pricing. Here it is on the roof (a few fence boards tossed in too while I was there). Alas. Skin was 840 xtratough from Corey Freedman at Skinboats, same for urethane and acid dye.

My father-in-law helped me mill the wood… my shop is a pretty good size at 15×24 but not big enough for this!

Beautiful clear boards! Sure easier than scarfing short stuff! Not cheaper.
For laminations I used Gorilla Glue. Now I know why I never have used it. What a damned mess! It cleaned up alright but man I hope someone can confirm that Titebond III is just fine for the laminations. Anyone used it with good effect? I’d sure like to as it water cleans up sooo much nicer. I did both sets of gunwales all in one lamination and then ripped them after cleanup and mortised (plunge router) them even though I pretty much went from that point onward just working on the first/larger boat. I had to move out of the shop at this point to the garage beside to not be tripping over myself working in the shop.


It felt really good to get it on the capture forms and make it look like a canoe!


It just took a few bends to get the balance of technique and steam time. Any breakage was not a problem with the product sent from Josh but the user; me. He sent me 17/64″ thick 1″ wide ribs at 45″ length or so (what I needed/asked for exactly). It was cheaper to do this than mill it myself. Came wrapped in plastic and very freshly sawn/green. I’ll order there again. I used a lee valley steamer that’s basically a drywall steamer and a long box I use for chair bending parts I already had. I steamed a little longer than Brian told me to get max pliability… maybe 10 min per rib? It varied a bit but the whole process of ribbing was pretty fast as ultra satisfying!


After lashing it all it was finished with Corey’s Pine Tar Boat Sauce. I flipping LOVED the citrus smell of it. Garage smelled great for a week. It also took a week to not be tacky! Funny that. I used Osmo PolyX Hard Was oil clear colour for the rub rails (scarfed these in cherry). Time will tell if it holds up. I’ve used it for furniture, table tops, etc. for years and like it, it cures fast, seems durable, is easy to re-coat. I used that on my paddles too and is holding up well I’d say but will need recoats every so often for sure.
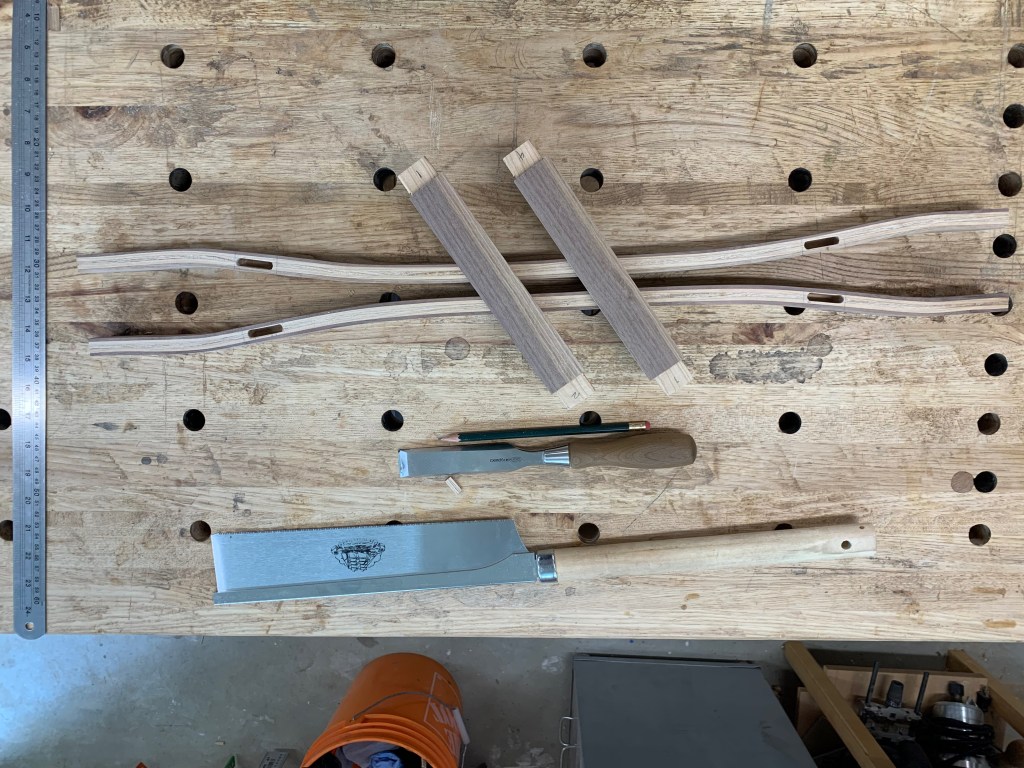
Next for me was the seat. I was waiting for urethane to come in the mail so timing was good! I ordered 1.5 orders of urethane which was more than enough but 1 order would have been a bit short for sure. Hard to believe: Brian was right!


Well… now it’s done! I did 4 coats of the urethane on top of that ‘copper’ colour (I’d call it red). Went pretty well. In the wrong raking light one can see the odd run. I’ll post a paddling update and some final measurements soon, my rib to beam, depth planned/finished/etc. It was 34 pounds will seat in and all the trimmings (foam flotation, couple of eyelets, carry handles, seat, etc.). Pretty good! Paddles so nicely!

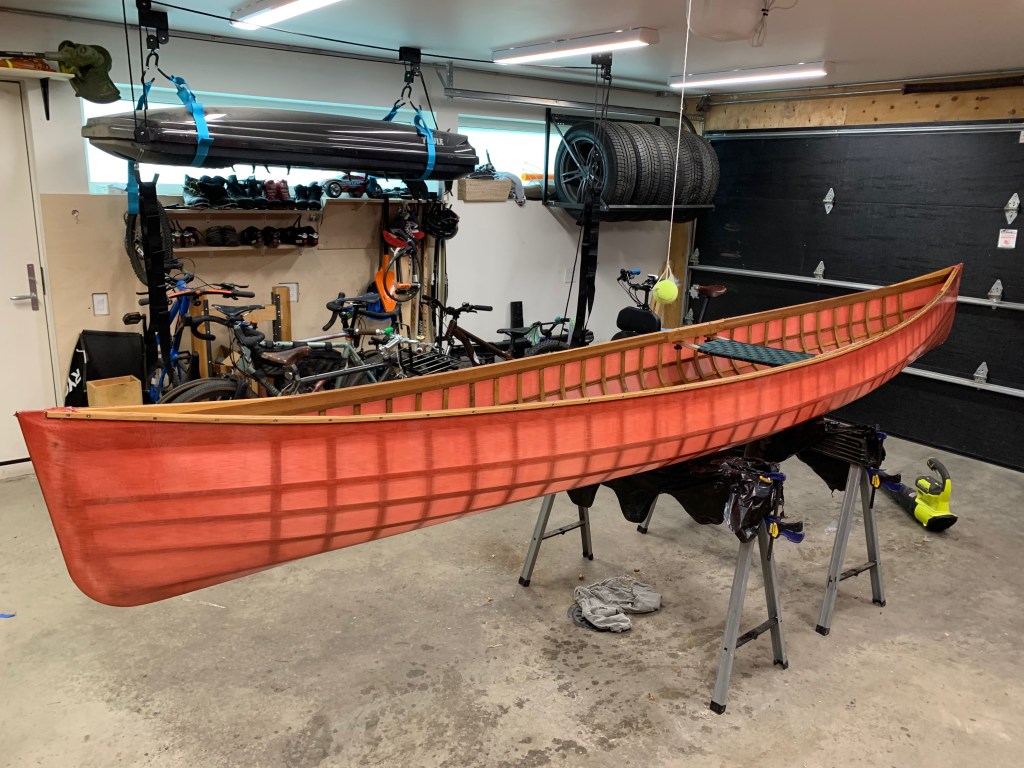


I put on 4′ long 1/2″ by 1/8″ quarter oval I bought at OnlineMetals.com… cheap and perfect! It countersunk and drilled really nicely on the drill press and bent easily. My little guy helped me with these finishing touches. He was pretty stoked to help me all along and was fun for him to build something we can use together.


SOME DIMENSIONS AND THOUGHTS
So… what did I build for boat one exactly:
Length: 15’6″
Beam: planned 31″ beam, for skinning I cut the centre spreader to 29″ so in total have 2″ of tumblehome; I think this is good… this is naturally about the amount the frame sprung back on it’s own. It did make the canoe maybe 1/4″ deeper to do this which is fine paddling-wise/stability-wise
Symmetry: asymmetrical with back 1/4 spacer for shaping being 1 1/4″ wider than the front; I also moved the centre spreader (31″, 29″ after tumblehome) back 6″ from centre
Depth at centre: 12 3/8″ (plus 1/4″ after tumblehome put in)
Sheer/rocker: both exactly what Brian suggested per the plans at 7 3/4″ and 2 1/4″… assymetric taller in the bow achieved obviously by stem height differences as per the plans
Sheer blocks: 1 1/2″ bow and 1 1/4″ in stern
Rib/beam 1.44
Depth/beam: 0.40
IMPRESSIONS
Overall this boat tracks VERY well. With a minimal J stroke it goes fast and straight. It could be a little turnier if I were honest for river paddling but for lake paddling it is truly a wonder! I had an actual skilled soloist friend paddle it and his words are: good primary stability, excellent secondary stability, very good tracking, slower to turn but excellent behaviour for lake paddling and good for swift water.
For me paddling it solo I feel it turns easily. I’m 185 lbs. My friend is 230 lbs. When I paddle with my older kiddo I prefer how it handles in the river with him (60 lbs) behind me. On flatwater he prefers to be out front and that’s fine too. We have tandem paddled it together for him to feel like he’s part of the action and he just sits on a drybag with some gear and is happy as a clam. I’ve paddled with him in the back and my 45 lb 4 y/o in front in class I whitewater and it’s stable and fine although slower to maneuver of course. Overall as a solo with a single kid and light camping gear it’ll be perfection which is what I’d planned this boat for. The smaller boat will be 12″ shorter, 2″ narrower, I’ll add a sniff of rocker to it though. It’ll be for my wife and a kid for trips or for me by myself should be perfect!
Durability-wise sure seems solid. 120 km/hr on the roof and doesn’t even wiggle in the wind. I love that! Sorry Brian but I did bump into a few smoother rocks in a couple of too shallow bits of river where my line could be better. Hopped out right away and walked a few metres to get past it. Honestly can’t even really see on the fabric where it touched. I feel good about this boat but will of course endeavour to be kind to it!


DYE TRADE and Boat Number 2!
How fun is blogging. Rory from Vancouver and I are both building two boats and decided to swap a unit of dye so my next will be golden yellow… his will be Red. Sweet! Who says social media sucks?! All pics here down are the new/2nd boat. Thanks Rory for the dye! I like the yellow quite a lot!


Super happy with how these two boats nested! They fit perfectly together taking the seat out of the larger boat.
Overall I’d say they paddle very similarly. Weather turned after only a couple of quick paddles on flatter water with the smaller/yellow boat but I’d say any difference between the two paddling is subtle. A little nicer reach on the smaller boat for a solo paddler as expected. More info to come if and when I have some insights into it. What a great ride this project was!! Thanks Brian and Liz!!


June 29, 2021
Great job Grant!
I love the colour. Is that “copper” colour one of the ones Brian uses or another? I avoided red on mine for risk of fading later, but I’d be very keen to make a red boat in the future – could you update us later if it changes colour in the UV?
Any leads on those wider pool noodles? I’m in Canada too I can’t find them anywhere!
June 29, 2021
I will update for sure. I bought the copper colour from Skinboats.org with my skin order just to keep it simple and make one order and ship it all together vs. buy from Brian. Wiithout the urethane it looks… to my eye… sort of pinky-salmony colour and to be honest I don’t mind that! I wonder if the more red will fade to that in time? I’ll update! The wider 4″ x 3 foot long pool noodles were $20/pop from Amazon. I did two per side to make for 6 feet of side flotation. I also bough some NRS canoe floats from MEC for $120. Haven’t used them yet but will tomorrow and will post a pic of them in. I know Brian uses the much larger solo canoe floats but they cost more and are so big I am not sure I could have space for a kiddo in the front which I need. Maybe noodles plus smaller floats will be plenty. Next hot day (tomorrow it would seem)… I’ll do a test roll/rescue! Links to both below. The work fine and when laced in basically are so snug they behave as if they were one long solid one so that’s fine. I’d prefer black or grey for colour as I suspect with time would look better than dirty white but couldn’t find any anywhere. If you do please let me know!
https://www.amazon.ca/CanDo-White-Foam-Roller-Round/dp/B001RQ3WPG/ref=sr_1_8?dchild=1&keywords=fabrication+4%22+pool+noodles&qid=1625006084&sr=8-8
https://www.mec.ca/en/product/5027-725/Canoe-3D-End-Flotation-Bag?colour=LGY00
June 30, 2021
Thanks! I’ll check those out!
I also grabbed some NRS end float bags at MEC. I haven’t tried them out yet but they seem pretty tough.
Very jealous of your shop setup! Great work on the boat it looks excellent. For continuity on your tandem build question I’ll reply to your other comment on my page…
Hope we can send the “heat dome” weather over your way tomorrow then, but that it cools down some before it reaches you. Good luck with the capsizes!
July 19, 2021
Hi Grant, Great looking canoe! I recently bought the course and hoping to do something similar as you, build two large nesting canoes, for me and my wife, with enough room to put the kiddos in occasionally as well.
I’m in Alberta as well. Where did you source your cedar and rib stock from? Thanks
Jordan
July 19, 2021
Rib stock was from Josh Swan in Wisconsin… took a while but mint when it got here. Freshly sawn and bent very nicely as per the videos of Brian’s. I got him to just mill it to 17/64″ thick x 1 inch wide x 46 in long and shipped in a small skinny box. On balance cheaper and easier and more certain I’d have what I need in terms of amount. I got him to send me 40 ribs, needed 31, I broke four or five so worked out right! The cedar I bought at Cedar shop in Calgary in 16 foot lengths which they had a moderate quantity of. Maybe call first if you’re travelling to get it. NOT especially cheap but worth it. I do have a friend that built up a similar boat from lumber store fence board grade cedar that she scarfed to get clear lengths. A lot of work. For me an extra 100 bucks here was EASILY worth just buying good wood and not mucking around too much on that end.
July 19, 2021
Great write up.
I was able to find 4 inch noodles on Amazon here in the U.S. Not sure if they are available in Canada or not.
https://www.amazon.com/dp/B07Y5NDCFD/ref=cm_sw_r_cp_awdb_imm_SCZFYJDEA0G5HWYY1R1M?_encoding=UTF8&psc=1
July 19, 2021
I’ve actually ditched the noodles. I decided they occupied too much space and didn’t let me put my knees right up against the side of the canoe in slightly spicier whitewater which I have been dabbling in of late. I put NRS floats front and rear (smaller sized tandem floats… I’d love to have bigger large solo floats but they’re 175/float x 2 vs. 120 for the pair. The smaller floats seem to have enough that if I flip it I can still self rescue and don’t take up too much space in the boat and leave room for my knees to be up against the side of the boat if I’m keeled over a bit or if I REALLY want the extra stability.
July 19, 2021
Beautiful work and nice blog, Grant.
I plan to build a nesting pair in sizes similar to yours. I am VERY interested in how well they nest after you give 2 inches of tumblehome.
Have you started your build of the smaller boat? Please keep us posted.
Best,
Louis
July 21, 2021
I have started. It should nest no problem but I may need to flex the frame out a tiny bit on the larger canoe. It only has 1″ each side of tumblehome and there’s definitely enough flex with the seat out to make it work. I’ll update though for sure and share pics or a video of it in action.
July 22, 2021
Thanks – that is very helpful.
January 11, 2022
Nested perfectly in the end doing them 1′ different length and 2″ different width. I think with the tumblehome the length difference might be best being nearer to 12″ as far as I can tell.
January 12, 2022
Awesome boat!! Given pandemic shortages how much did the lumber for both boats cost?
January 17, 2022
Oh man… I totally forget! I try to forget the negatives like cost! The 16′ long clear cedar wasn’t cheap; a few hundred per boat for sure! I thought about lumber store cedar really picking boards then making up longer stringers but too much work! The oak ribs were about 200 per boat plus shipping.
August 24, 2024
Beautiful boats! I was pleased to see that you added some tumblehome to them without nesting size issues; I think I’ll give it a try on my build. Great photos! Thank you for sharing.